Add a Shadow to an Object/a Person in Photoshop
Add a shadow to an object/a person in Photoshop.
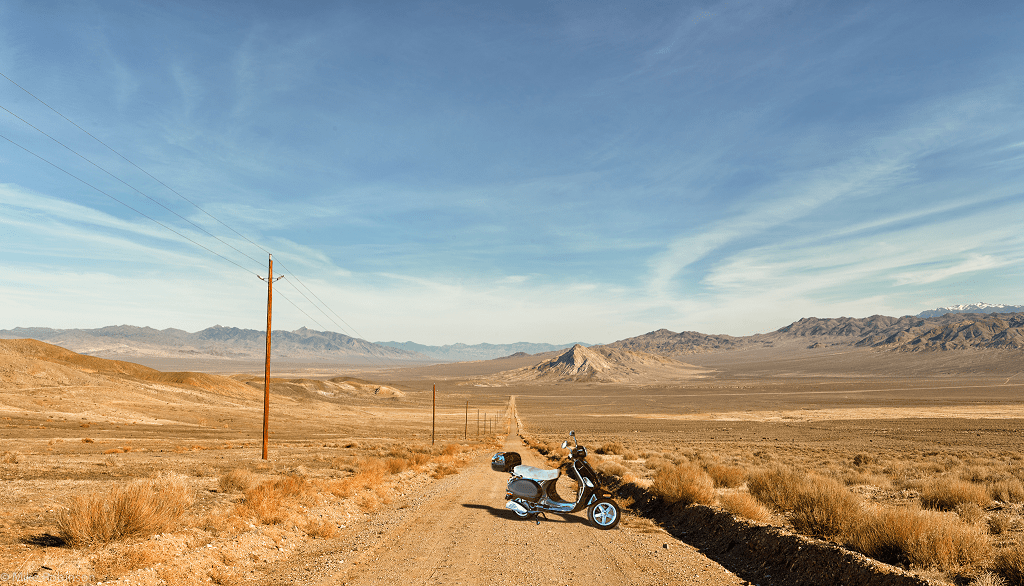
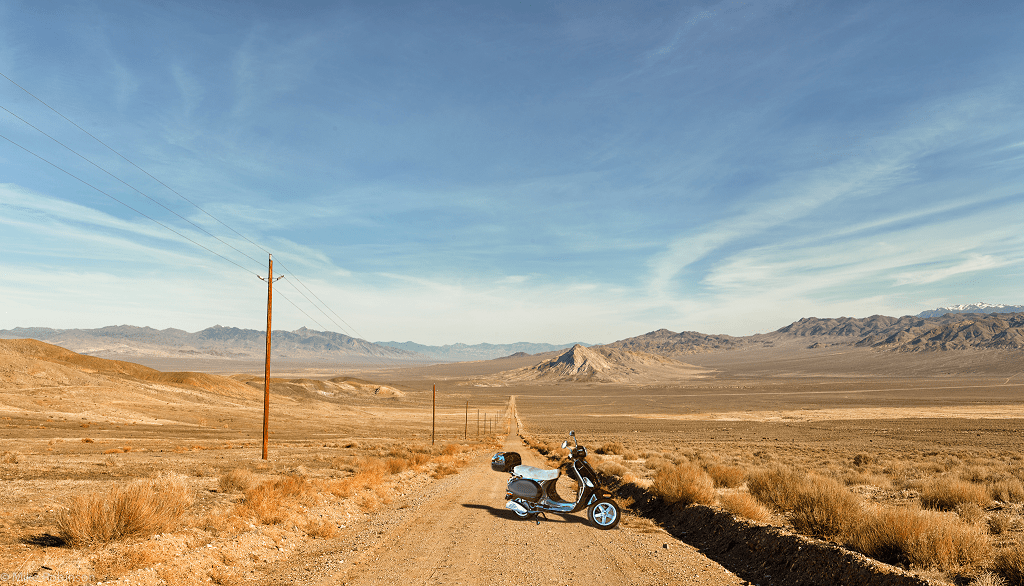
When you insert an object or person into another picture with Photoshop, it is very important to add a shadow to that object or person to make things realistic and believable. In this tutorial, we gladly help you to add a shadow to an object/a person in Photoshop. As you see in our example, we have inserted a scooter with a shadow into a desert background. How did we create that shadow? Check it out here!
Summary
More profound: how to add a shadow to an object/a person in Photoshop
We already extracted the object, in our case a scooter, from its original background in a previous tutorial (click here). Now we want to insert this object into a different picture and we want to add a shadow to it. To learn how to insert an object into a different picture, click here.
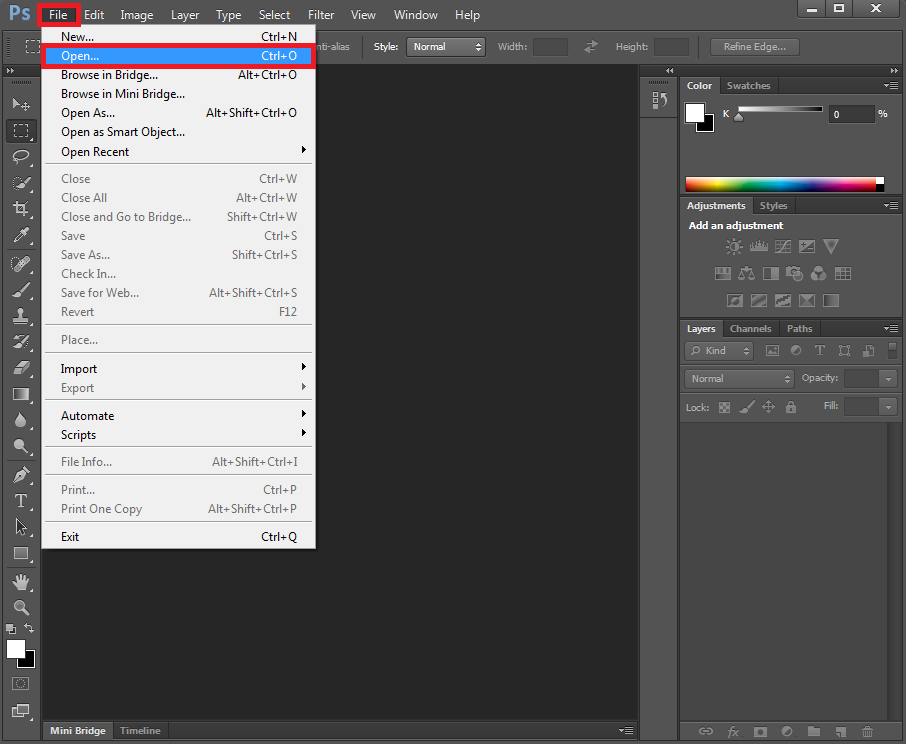
Start by opening Photoshop. Click ‘File’ and then ‘Open’ to browse your computer to get the image with the extracted object into Photoshop (or simply press ‘CTRL+O’ on your keyboard). Or you can browse your computer or external drive to find that specific image, right-click the image and select ‘Open With’ Photoshop. Make sure that your image is on a transparant layer and that you leave enough room to add the intended shadow.
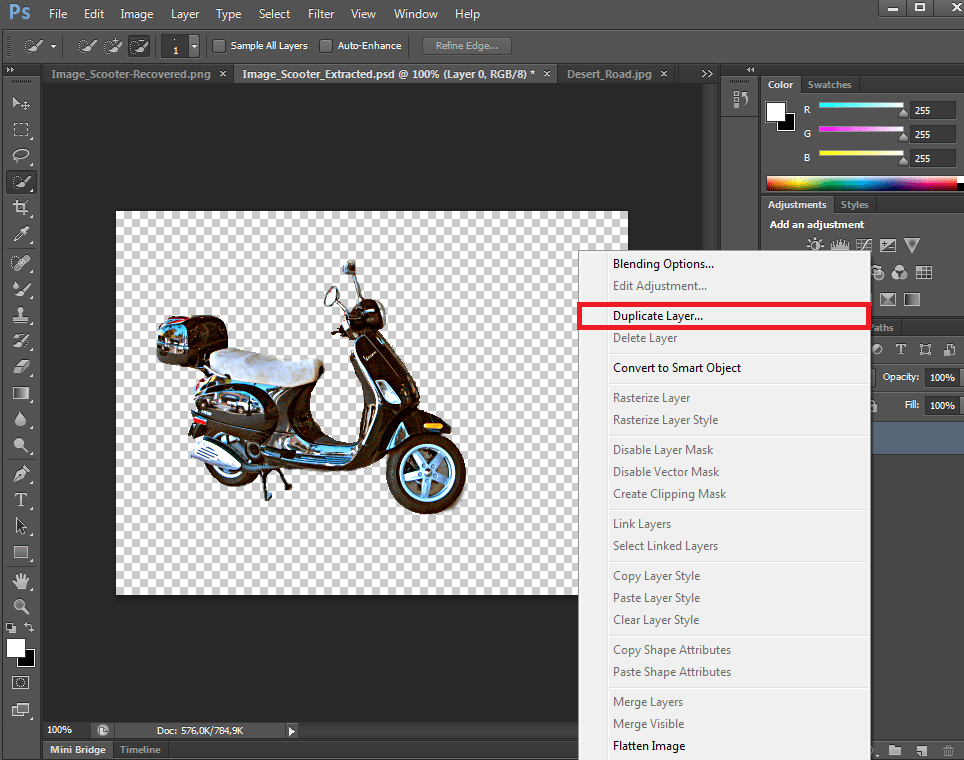
Right-click your Layer Name and select ‘Duplicate Layer’ or hold down your CTRL (Windows) or CMD (Apple) key and press ‘J’. This is a Photoshop shortcut that will also duplicate a selected layer.
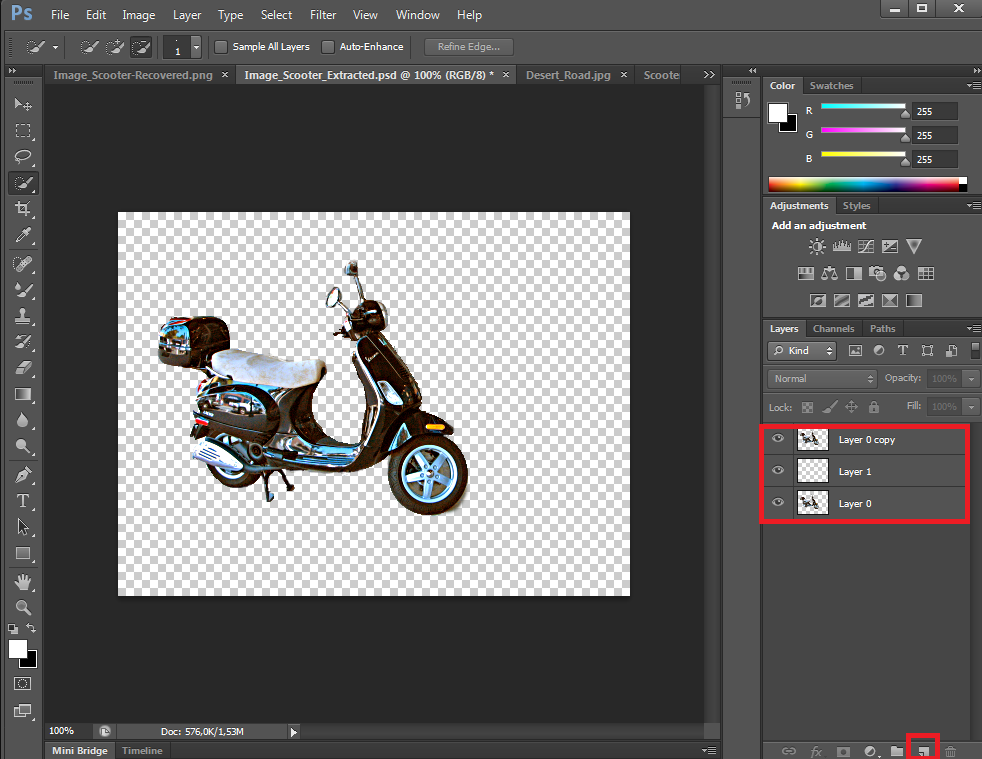
You can also add a blank layer, a template where you can put your background picture. Make sure to select the duplicated layer and hold down your CTRL (Windows) or CMD (Apple) key and click on the ‘New Layer’ icon at the bottom of the Layers panel. This tells Photoshop not only to add a new blank layer as it normally does, but to add the new layer below the selected layer (your duplication of your original layer). This step is not obliged.
Next, hold down your Ctrl (Windows) or CMD (Apple) key and click directly on the top layer’s thumbnail/icon in the Layers panel (your duplicated layer). Don’t select the layer, but click on its thumbnail! This loads a selection around the contents of the layer, in this case the scooter.
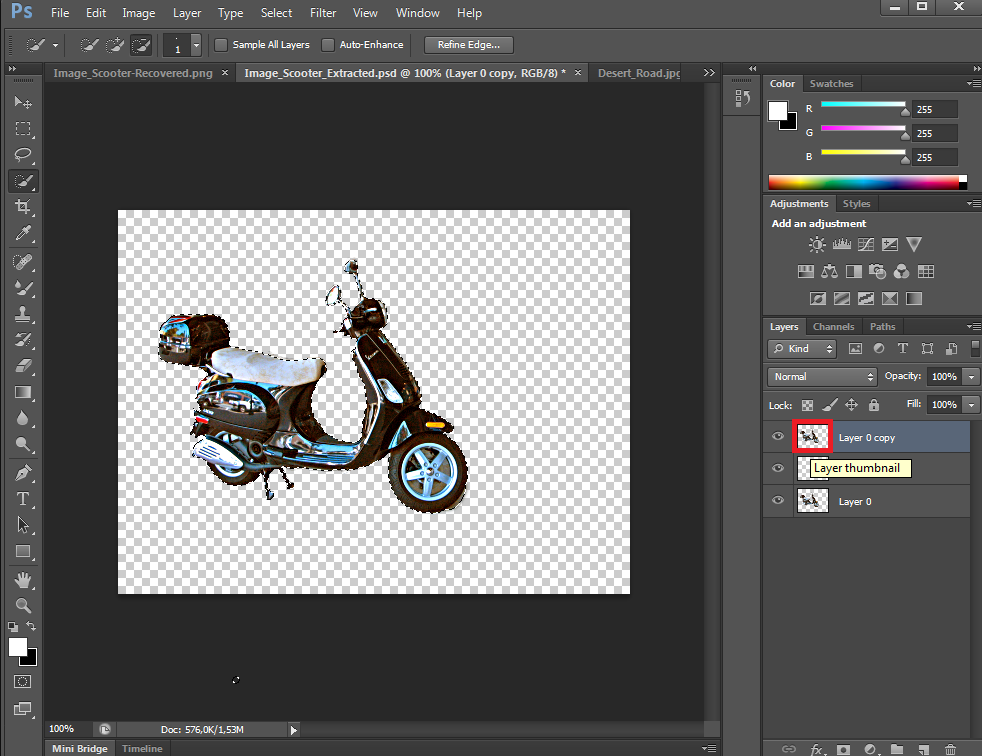
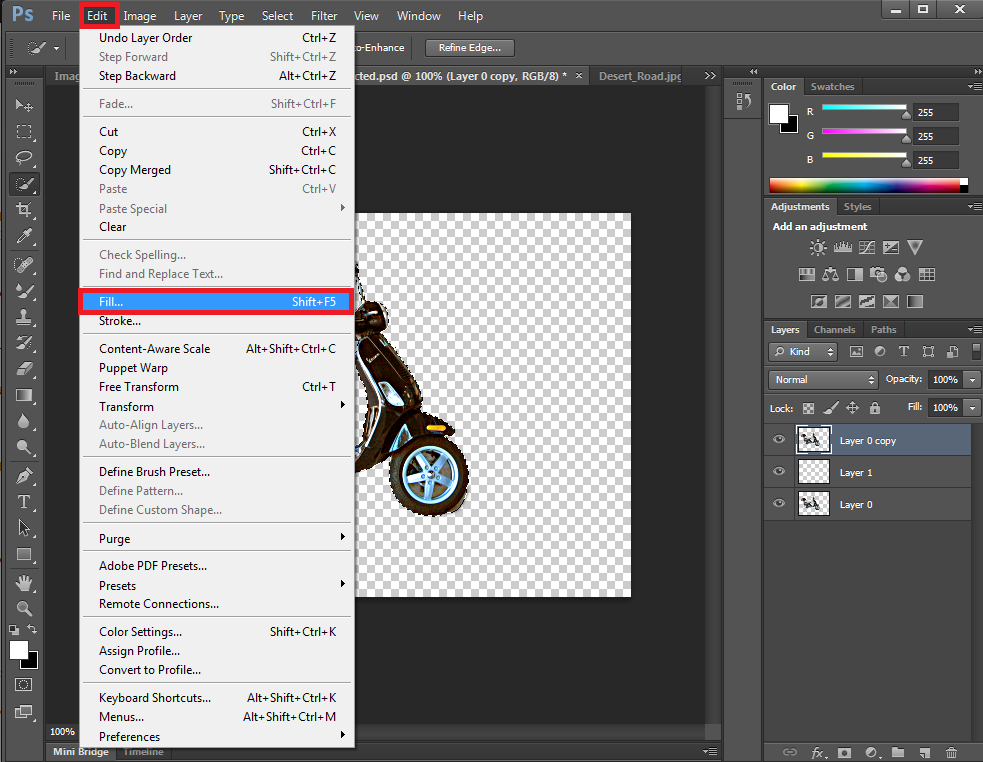
Now we need to fill this selection with black. Go up to the ‘Edit’ menu at the top of the screen and choose ‘Fill’.
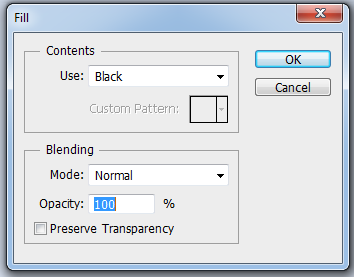
In the window that opens, change the ‘Use’ option to Black. Click ‘OK’ to close the dialog box.
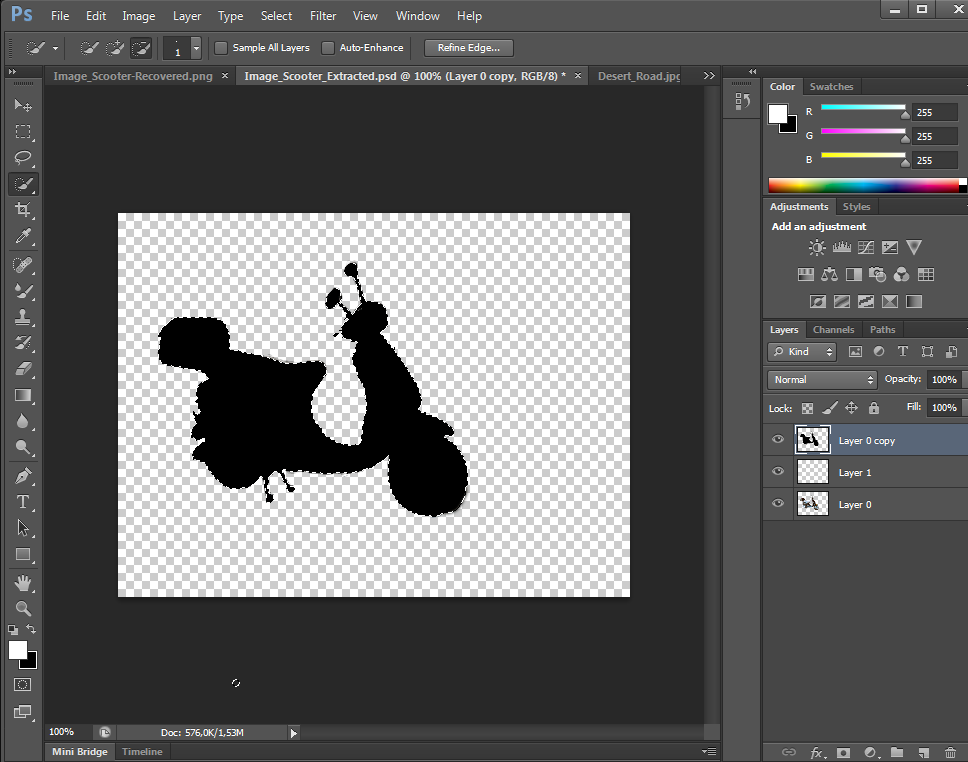
You will now see that the object in your duplicated is filled with black. This will become our shadow.
We need to reshape our shadow and drag it into position. Make sure to select the shadow layer. Go to the ‘Edit’ menu, choose ‘Transform’ and then click ‘Distort’.
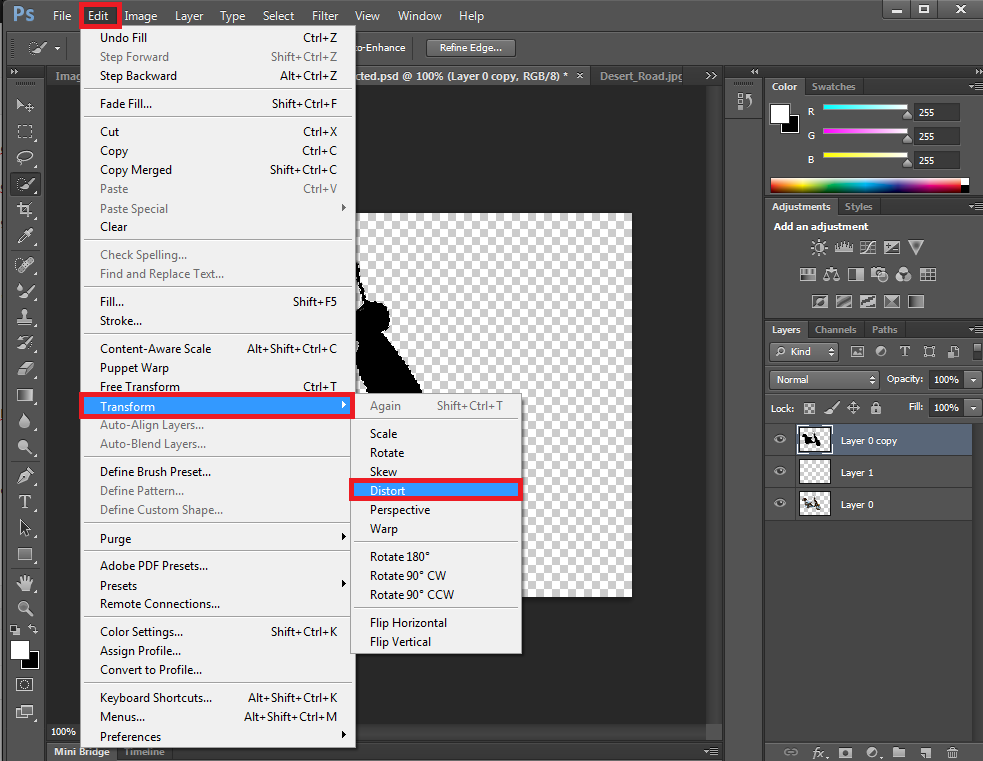
You want to use the ‘Distort’ feature to drag the shadow down. Click the top transform handle and reshape and drag it down diagonally, either left or right. (Depending on the picture in which you want to insert the object or person. You don’t want to make the mistake of dragging your shadow to the wrong direction! As you will immediately notice, your shadow layer is on top of your original object layer, but of course you often want your shadow to be positioned behind the object or person (Except in the unusal case where the light comes from behind). To get your shadow behind the object/person, drag your shadow layer under your original layer in the ‘Layer panel. Continue with your tranformation. If you are happy with the distortion, you don’t have to continue with the ‘Distort’ feature. Further move your shadow around and rotate it if needed, simply using ‘Free Transform’ (Click ‘Edit’ and click ‘Free Transform’ or better: press CTRL+T). Don’t forget to fix the bottom part of your shadow too by dragging the bottom corner handles to line up with the object. Click in the frame or press ‘Enter’ to accept the transformation.
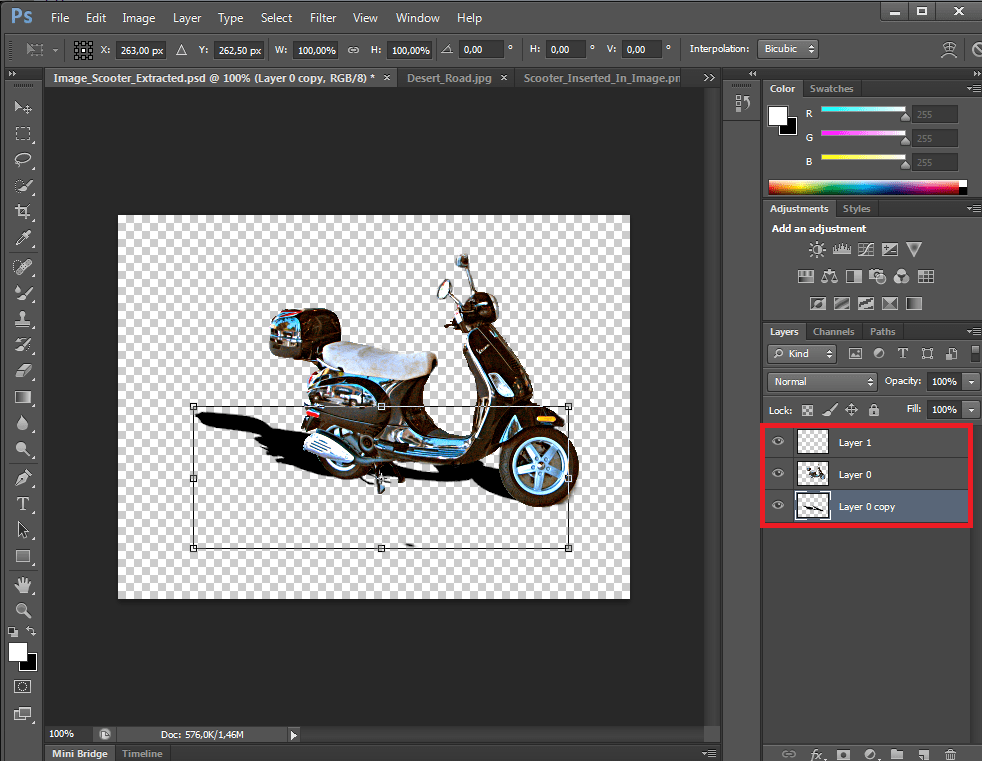
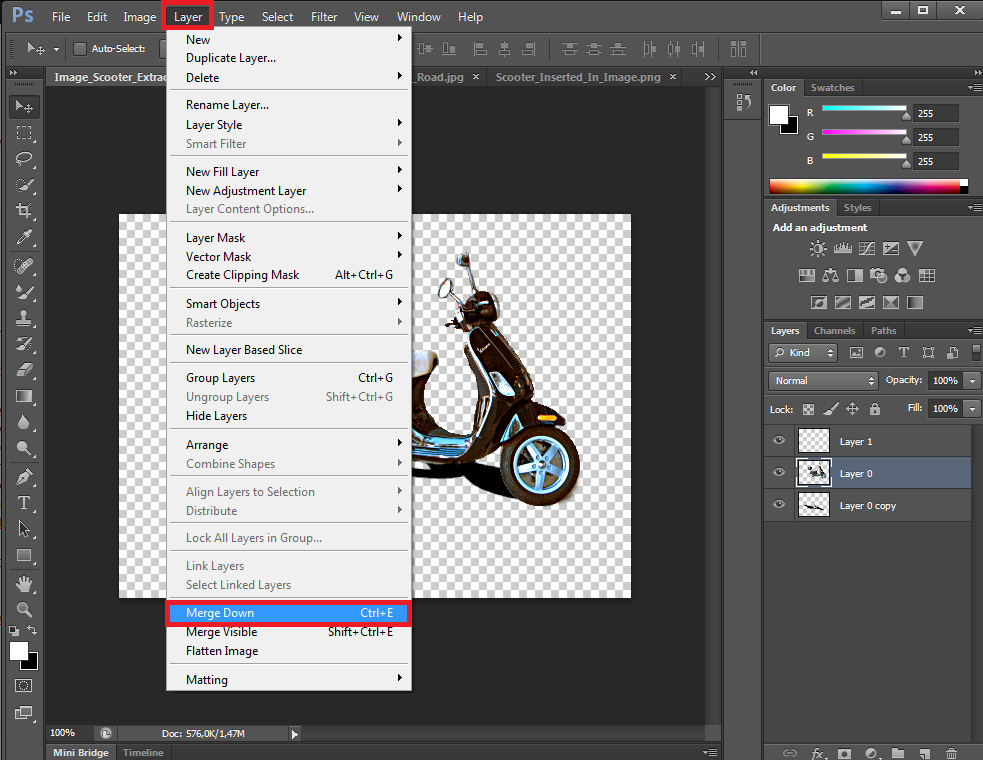
To merge the object layer and shadow layer select the object layer, click ‘Layer’ and click ‘Merge Down’. Or better: click CTRL+E (or CMD+E). This is handy to insert both your object and shadow together into another picture and not separately (which means that you have to move the shadow around again to refind the correct position). However, sometimes you do not want to merge the layers at all. CTRL+E makes it impossible to make changes to the position of the shadow later on, whereas it could have to be altered a bit when you see the result in the new picture.
Whether or not you decide to merge the original object layer and the shadow layer, this is an example of a first result.
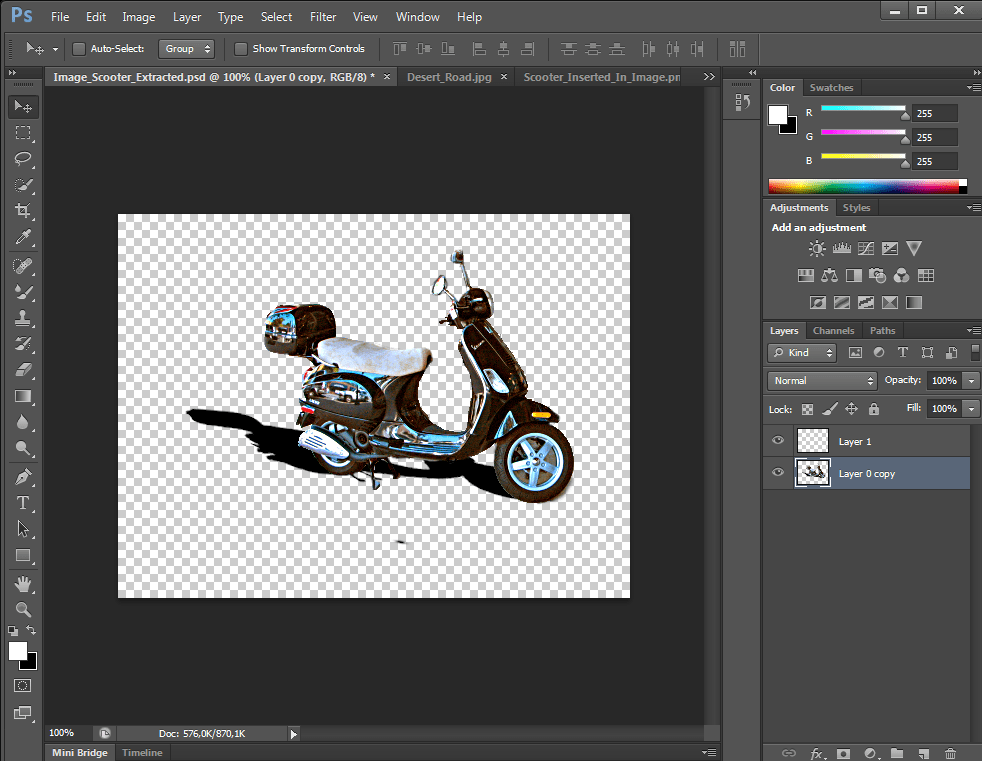
We say first result, because as you can see, the shadow is very dark and has sharp edges. For us it is important to have a rather dark shadow, because the real shadows in our desert picture are also quite dark. Don’t make the mistake of having two different kind of shadows in one picture. This makes the result unnatural and people will notice that the shadow isn’t real. To make shadows lighter and edges less sharp, apply a blur. Click ‘Filter’, choose ‘Blur’ and click ‘Gaussian Blur’. You can also play around with opacity. Of course, always remember to select the correct layer.
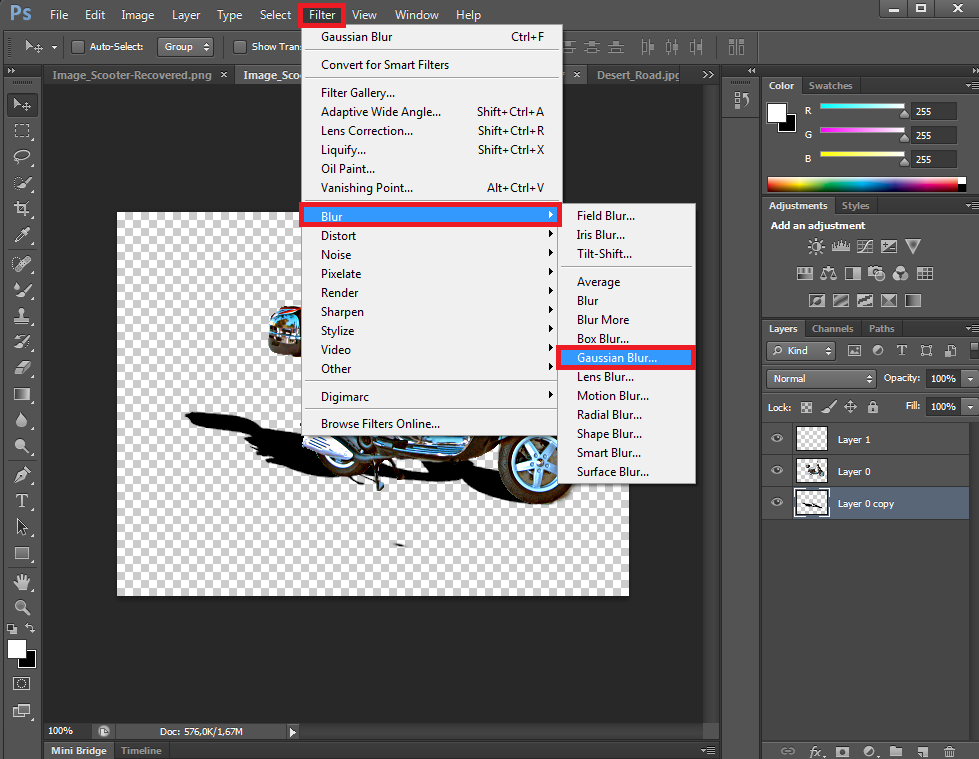
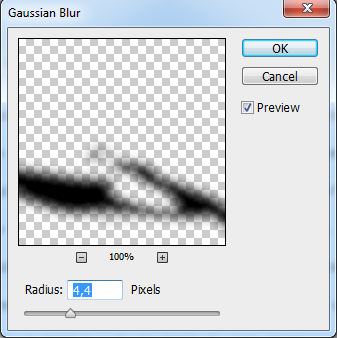
The ‘Gaussian Blur Dialog Box’ will open. Play around with Radius to get the desired result, then click ‘OK’ to end.
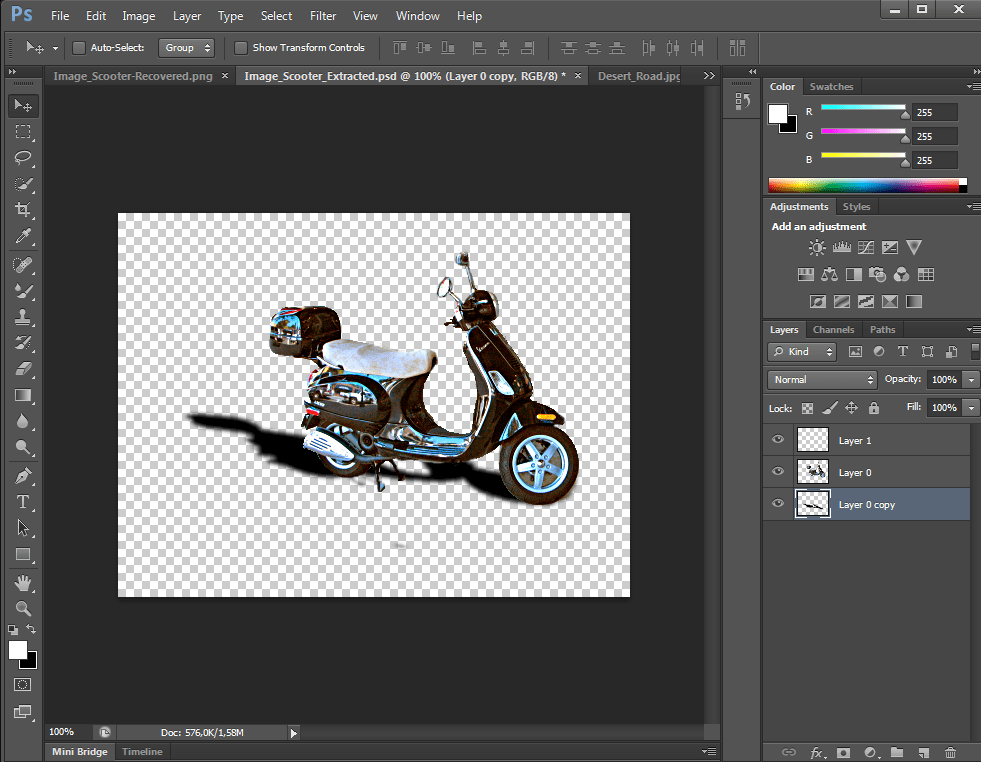
As you can see, we have still opted for a rather dark shadow, but we have made the edges softer.
And this is the result when we insert the object and the shadow into our desert picture. Don’t know how to do that? Click here. The shadow makes the presence of the scooter in the desert landscape much more realistic, right!?


Beautifully Explained….Concise and Clear. Thanks A Lot !