Change the author name in Word
Change the author name in Word
When you create a document in Microsoft Word, the documents have a default author name. The default author name is the name of the person who owns the account on the computer or the other device on which Word is installed. The author name is visible on the information page of a Word document. The name helps to manage your documents and it also helps to keep authority of documents. If you are working on a computer of a friend or in a library, you may want to change the author name in Word to make sure that it is clear for others that you are in fact the author of a certain Word document. There are a couple of ways to change the author name in Word. In the following tutorial, we gladly show you how to change the author name in Word. The fact that you change the author name in Word for one document does not mean that this holds for other Word documents.
Tutorial
The first way to change the author name in Word
Click the ‘File’ tab.

Look at ‘Info’.

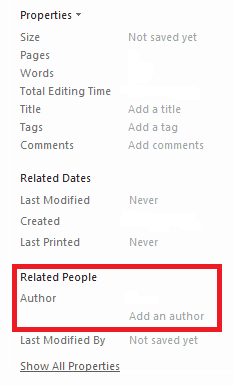
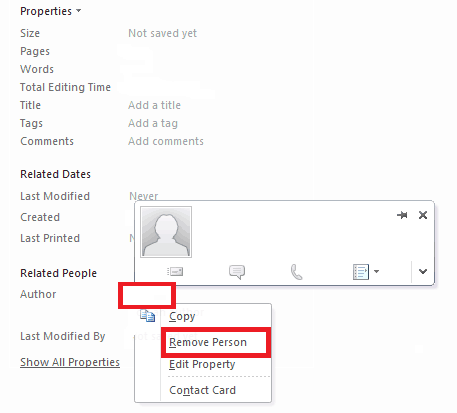
Under the ‘Related People’ section, you normally see a name next to ‘Author’ (we have deleted it in our example). Right-click this name and then click ‘Remove Person’. Type in your own name to change the author name in Word to your name.


The second way to change the author name in Word
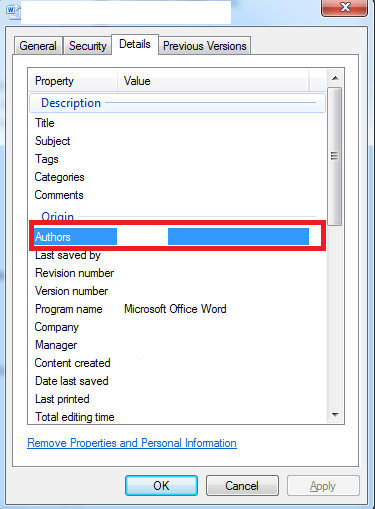
If you have already saved a document and want to change the author name in Word later, go to the specific document wherever you have saved it. Right-click the document. Click ‘Properties’.

In the following menu that opens, click ‘Details’. Under ‘Origin’, you see ‘Authors’. Delete the default name and type in your own name. Click ‘OK’ to save the changes that you have made.


