Create a Table of Contents in Word
Create a Table of Contents in Word
If you have a large Word document with several titles, subtitles and sub subtitles, you definitely want to create a Table of Contents in Word to guide your readers. When you want to create a Table of Contents in Word, you have to go through a two-step process.
First step: Identifying the Text that you want to Present in your Table of Contents
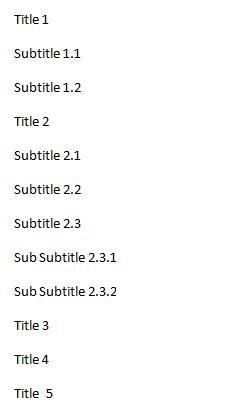
The first step to create a Table of Contents in Word is identifying the specific text (titles, subtitles and sub subtitles) that you want to present in your Table of Contents. Your document for example consists of the following titles, subtitles and sub subtitles.
Select each title separately or select all your titles at once, your subtitles at once, your sub subtitles at once, … On the ‘Home’ tab in Word, you see a ‘Styles’ section. Apply the ‘Heading 1 Style’ to titles, the ‘Heading 2 Style’ to subtitles, the ‘Heading 3 Style’ to sub subtitles and so on. Don’t worry if ‘Heading 3’, ‘Heading 4’, … are not immediately visible. These headings will automatically appear if you are applying ‘Heading 1 Style’ and ‘Heading 2 Style’.
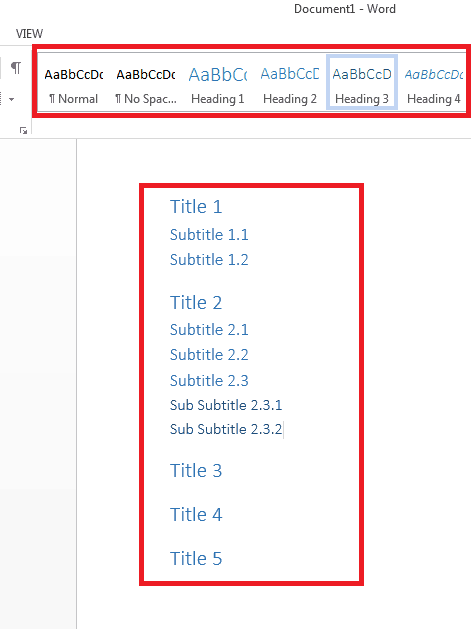
If you don’t like these example heading styles (for example if you want a different font, font size or colour) don’t start formatting the text. Modify the heading styles instead. We gladly help you with this.
Extra: Modifying Heading Styles
To modify the heading styles, look at the ‘Styles’ section on the ‘Home’ tab. Right-click the thumbnail that you want to give another style and click Modify.
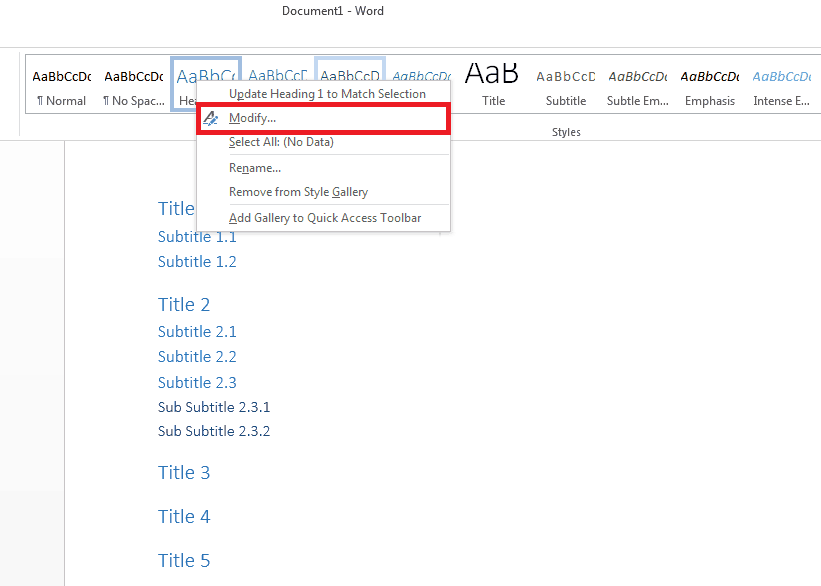
The ‘Modify Style Dialog’ will now open.
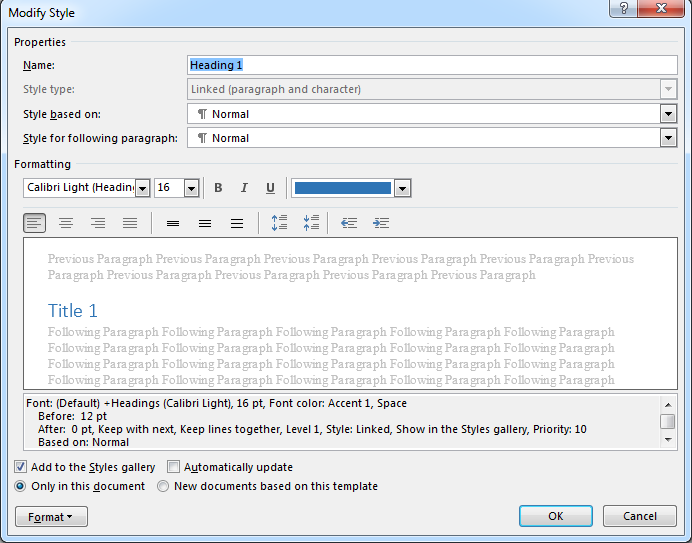
In the ‘Modify Style Dialog’, you can change a couple of things in ‘Properties’:
- – the name of your heading
- – the base style.
- – the style to use for the following paragraph: if you for example frequently use subtitles after titles, you can modify the style Title to be automatically followed by the style Subtitle.
In ‘Formatting’, choose between the characteristics that you want to modify: font, font-size, color, paragraph, whitespace, tabs, etcetera.
If you select ‘Add to the Styles Gallery’, your changes will be saved in the Styles Gallery template on which the document is based.
Tip: if ‘Automatically Update’ is selected, deselect it.
Tip: if you want to save this newly made title format for other Word documents and not ‘Only in this document’, select ‘New documents based on this template’.
Tip: click the ‘Format’ button for more formatting options.
When you have made all your changes, click ‘OK’. Your first heading style is now modified. Right-click the other thumbnails and take the same steps to modify the style of your subtitles, sub subtitles, …
Second Step: Create a Table of Contents
You are now ready for the second step in creating a Table of Contents in Word. Click the ‘References’ tab.

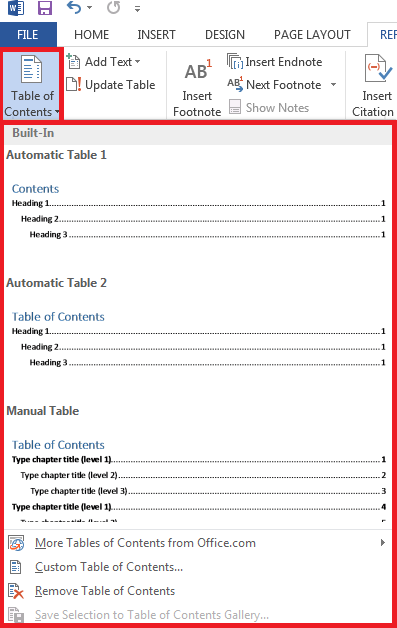
In the ‘References’ tab, you will see ‘Table of Contents’.

Click ‘Table of Contents’. You will see a couple of Table template examples to choose from. We for example choose the second template.
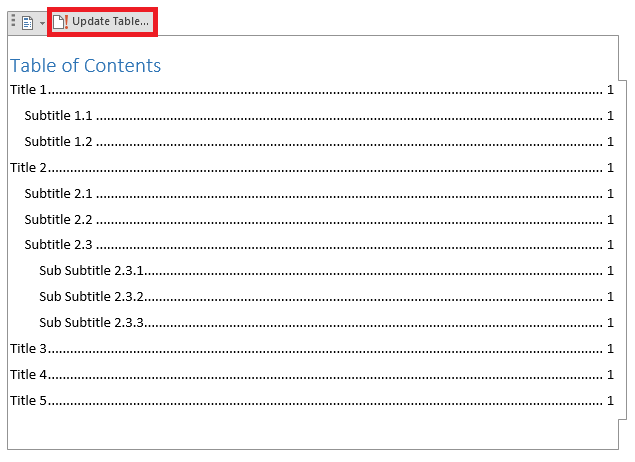
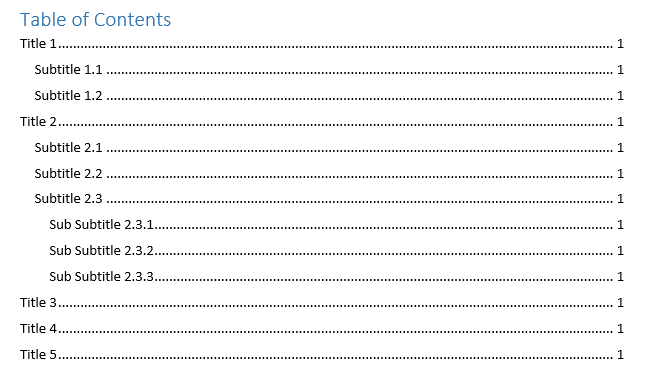
Your Table of Contents will appear in your Word document. As you can see in our example, all the titles are on the same page: page 1. This is of course simply a consequence of the fact that we created some example titles on merely one page.
If you move some stuff around in your document and/or if you change titles later on, don’t forget to update your Table of Contents! Word will not automatically update the Table of Contents to match the changes you make! To update your Table of Contents, simply click it and a toolbar will appear. The opened toolbar offers two options.
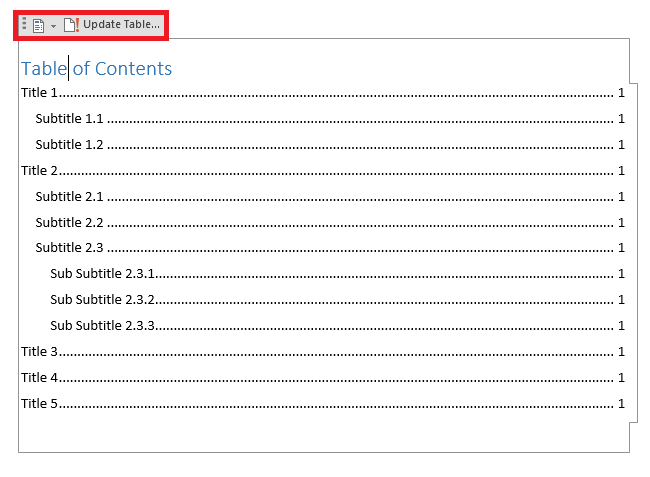
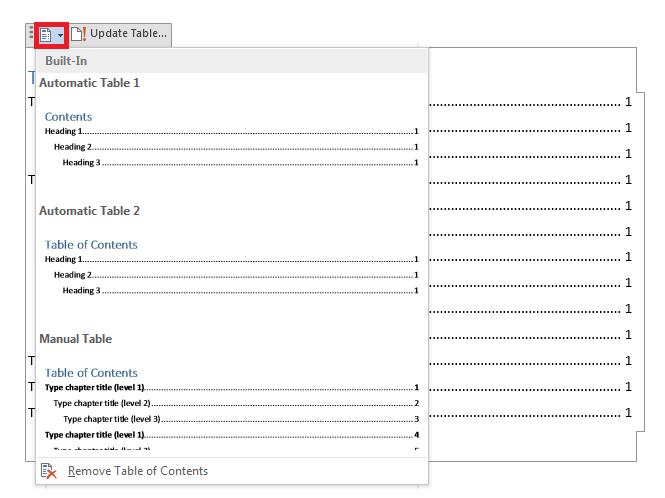
If you click the button left, you can choose a different table template or you can decide to remove your Table of Contents entirely.
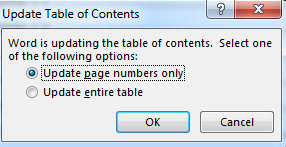
The second button is the one you need to click to update your Table of Contents. If you click it, a new window will appear. Here you will have the option to ‘Update Page Numbers Only’ and to ‘Update Entire Table’ (It is often better to choose the second option because it could be the case that you also made some changes in your titles. If you only click ‘Update Page Numbers Only’, Word will not update other changes.). Click ‘OK’ to end.
