Check spelling and grammar in Word
Check Spelling and Grammar in Word
It can be really useful to check spelling and grammar in Word. It is an easy way to spot errors that you simply overlook. It is important, however, to grasp that Word may think that some words are wrong or that grammar is wrong whereas this is not the case at all. Be careful and think for yourself!! Check out our tutorial on checking spelling and grammar in Word.
Tutorial
To check spelling and grammar, click the ‘Review’ tab in Word. Click ‘Spelling and Grammar’ in the ‘Proofing’ group.
A ‘Spelling and Grammar Dialog Box’ appears. The first suggested correction is highlighted. Use the different Word buttons to check your spelling and grammar:
- Ignore Once: ignore this word once, but check it again if it reoccurs in the Word document.
- Ignore all: ignore this word throughout the entire document.
- Ignore Rule: ignore this rule throughout the document.
- Next Sentence: check the next sentence.
- Add to Dictionary: include this word in the dictionary of the program.
- Change: use the suggested word in the Suggestions panel for the specific word.
- Explain: get an explanation for the change Word suggests.
- Change All: use the word Word suggests to change all instances of this word.
- Autocorrect: use the first suggested word each time you click AutoCorrect.
- Check grammar: select this to correct the grammar in the document.
- Undo: undo the change. Continue clicking for previous corrections.
- Options: the Options Dialog Box opens. Select how the program corrects spelling and grammar for all documents.
If your entire Word document is checked, Word will give you a heads-up.
Extra: turn on or off lines under misspelled or misused words or grammar errors
By default, Word automatically checks your document for spelling and grammar errors, so you may not even need to run a separate spelling and grammar check as shown above. When lines appear under words, simply correct the mistake you made or right-click the word and make selections from the corrections menu. If the word is not wrong but underlined, right-click and simply click ‘Ignore’. The fact that colored lines appear under words can really be a handy way to check your document for spelling and grammar errors while writing. On the other hand, if you are for example writing code language, Word will underline almost everything which could be rather annoying. Therefore, we provide this extra section in which we explain how to turn on the colored lines as well as how to turn them off. To turn on or off colored lines under wrong words and wrong grammar, click the ‘File’ tab. Click ‘Options’.
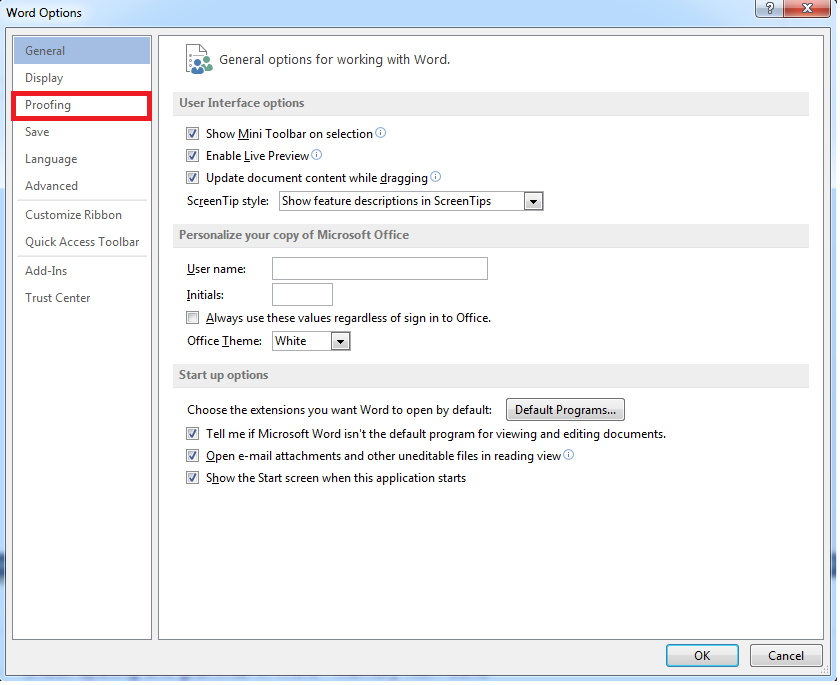
  The ‘Word Options Dialog Box’ opens. Click ‘Proofing’.
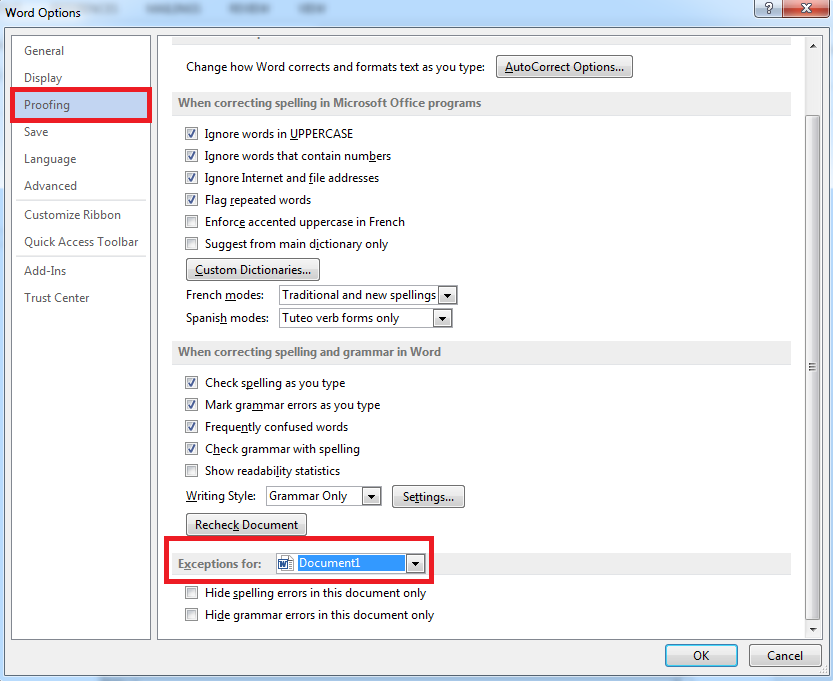
  Scroll down a bit. You see the ‘Exceptions for’ category. Select the currently-open document name to turn on or off automatic spelling and grammar checking for the specific document that you are writing in. Select ‘All New Documents’ to turn on or off automatic spelling and grammar checking for all documents.
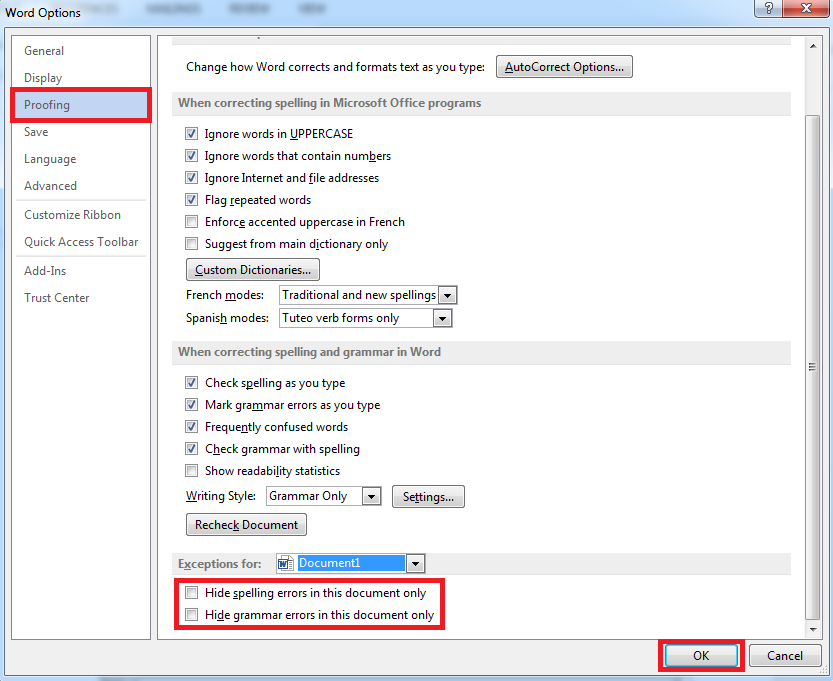
  To turn on the automatic spelling and grammar checking, leave the ‘hide spelling errors’ and ‘hide grammar errors’ boxes deselected. To turn off the automatic spelling and grammar checking, select the ‘hide spelling errors’ and ‘hide grammar errors’ boxes. Of course you can also choose to select or deselect only the spelling errors or the grammar errors box. Click OK to end.

