Remove an object/a person from a background in Photoshop
Remove an object/a person from a background.
It could occur that you want to remove a person or an object from a background in Photoshop. The background can simply be distracting or unnecessary to tell your story or you may want to feature the person or object in a different background. In the following tutorial, we help you to remove an object/person from a background in Photoshop, using the ‘Layer Mask’ method. We prefer this ‘Layer Mask’ technique to remove things from a background, because it gives you the best control.
Summary
- Open your image in Photoshop.
- Make your selection using the ‘Quick Selection Tool’.
- Add a ‘Layer Mask’ based on your selection.
- Double-click the ‘Layer Mask’ to open the properties panel and to refine edges.
- Further improve your Mask by painting with the ‘Brush Tool’.
- (Enable and disable your Mask to see the changes that you have made.)
More profound: How to remove an object/a person from a background in Photoshop
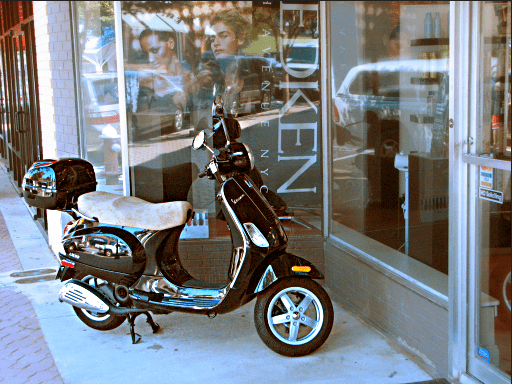
We use the same example image that we used before to help you with the basics in Photoshop: the image with the scooter. For some reason, you want to eliminate the scooter from the background.
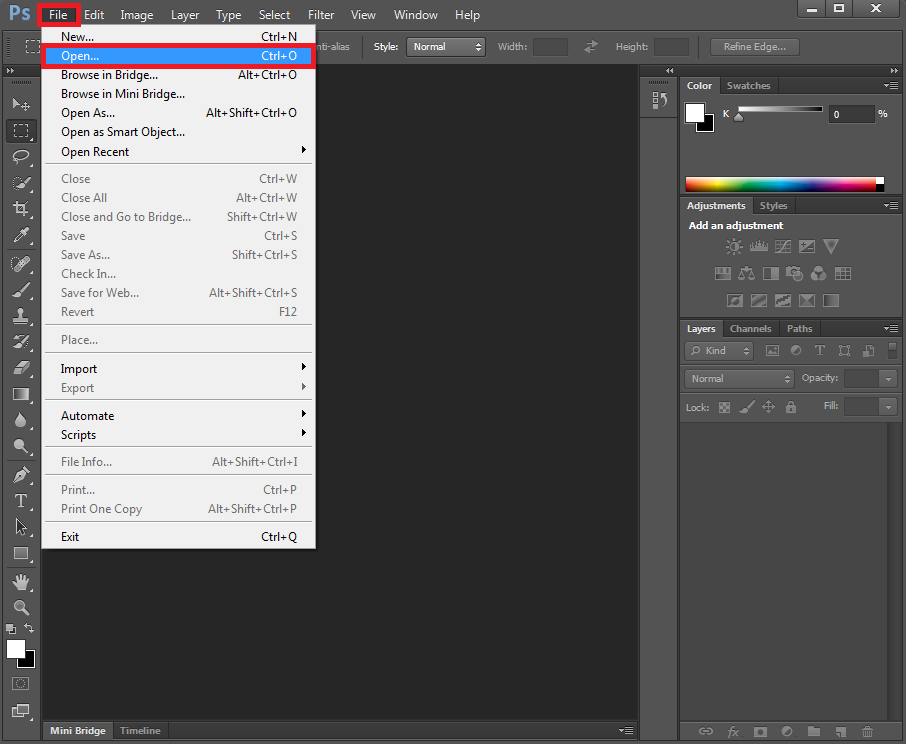
Start by opening Photoshop. Click ‘File’ and then ‘Open’ to browse your computer to get the image that you want to edit into Photoshop. Or browse your computer or external drive to find that specific image, right-click the image and select ‘Open With’ Photoshop.
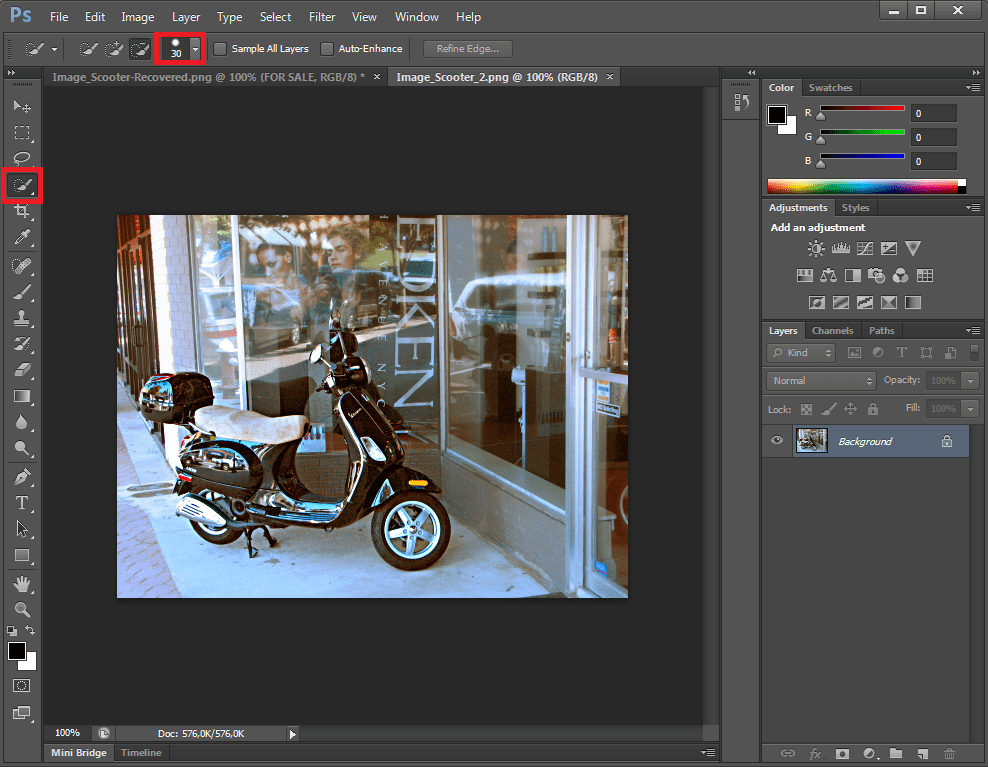
Click the ‘Quick Selection Tool’ in the list left in Photoshop. Play around with the brush size if you use this ‘Quick Selection Tool’. Use the ‘Brush Picker’ in the toolbar that opens to increase or decrease brush size or use the following shortcuts on your keyboard: press ‘]’ to increase the brush size and press ‘[‘ to decrease the brush size. Use the wide brush to go over your object or person quickly and use the smaller brush to work around the edges. Zoom in and patiently paint over your object or person.
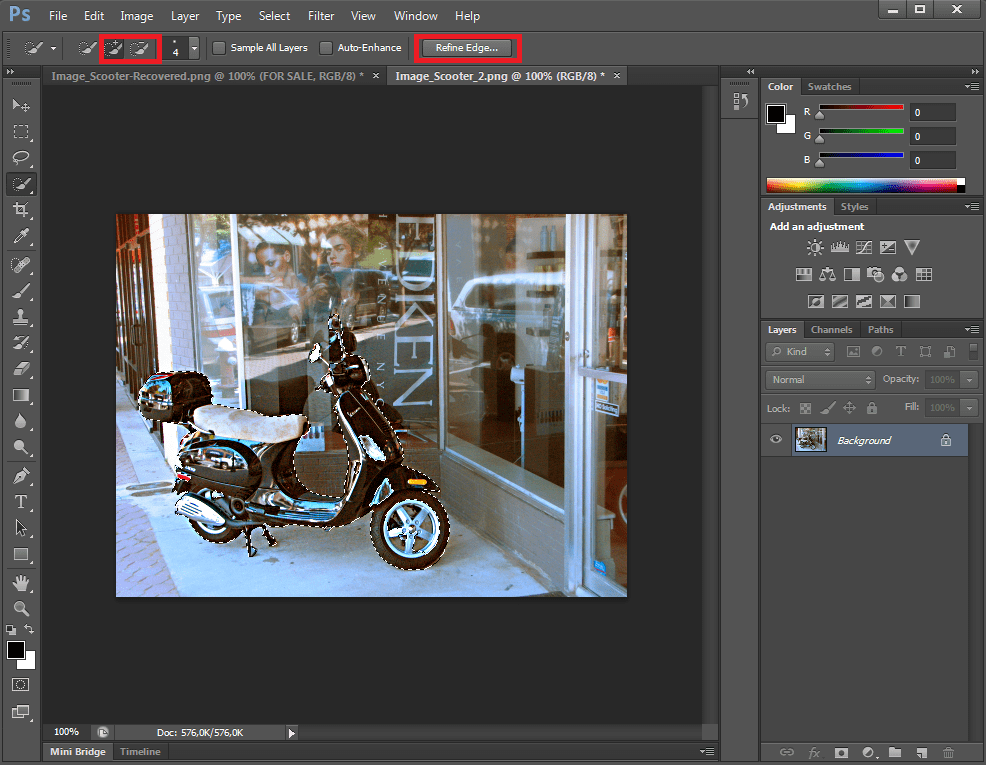
Things will look like this. If you made little mistakes in your selection, don’t worry. You can simply use the ‘+’ and ‘-‘ in your toolbar to add and substract parts of your selection. Our example is not that easy to work with, because our edges aren’t really defined in some places. The same is true when you work with people. Hair for example always makes things tricky. We need to fix this difficulty. You could try to fix things using the ‘Refine Edge’ button that you see in the toolbar, but it is better to add a ‘Layer Mask’.
To create a Layer Mask, click the ‘Layer Mask’ button.
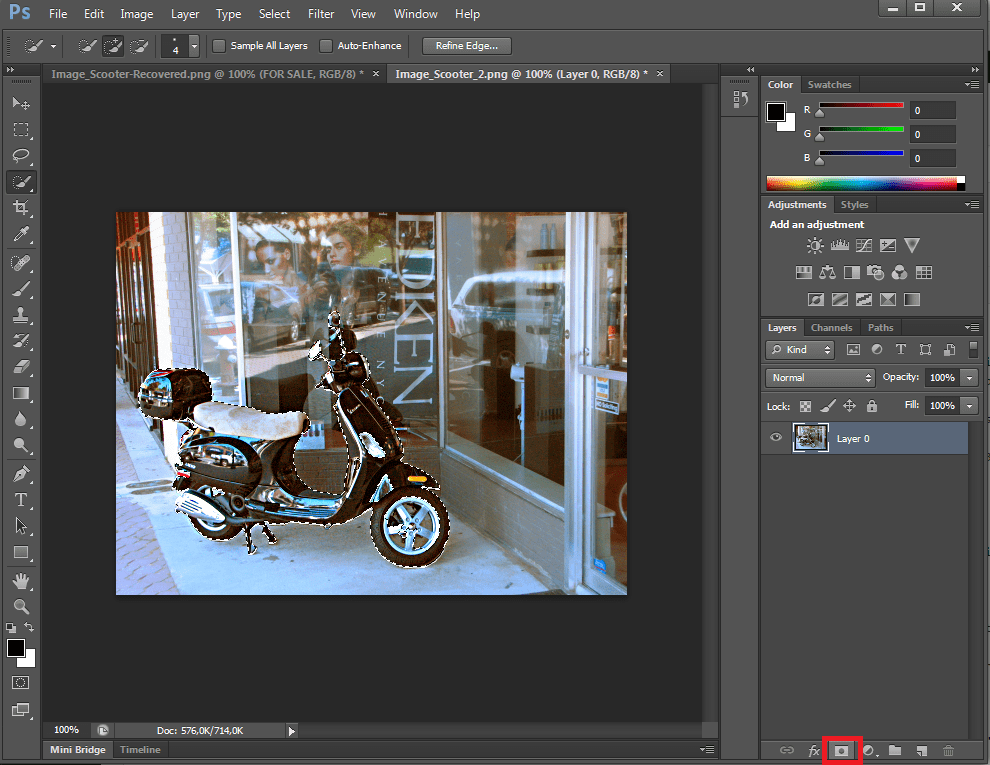
You will see the following. You can see that our quick selection already worked nicely! But there are definitely still some things to fix.
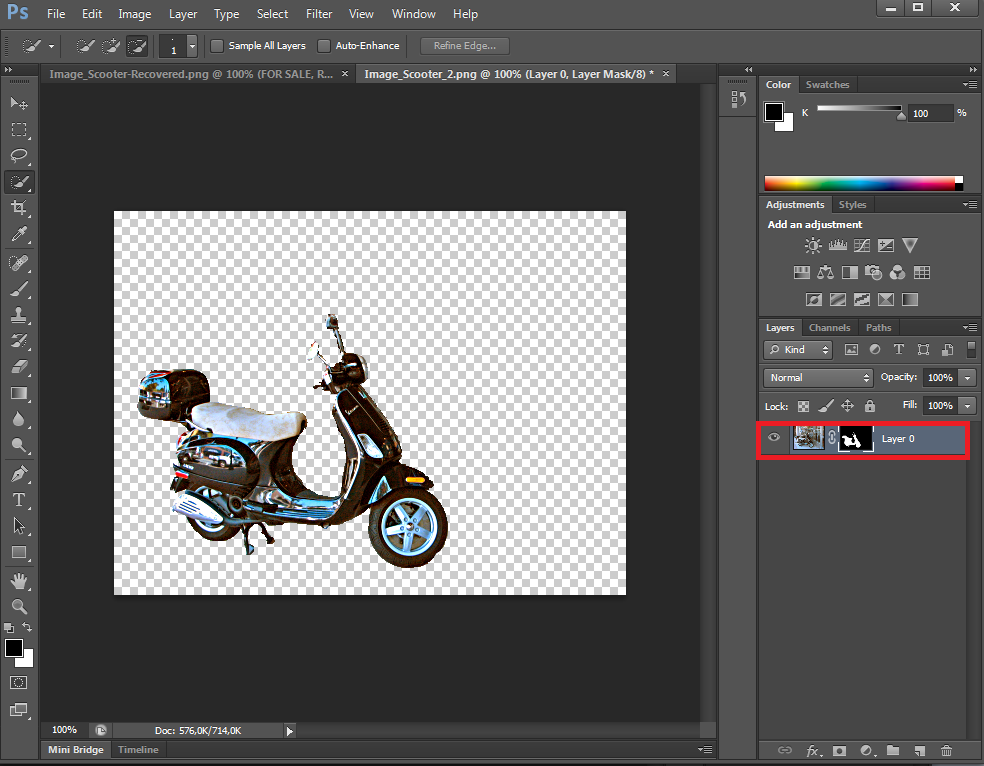
To make things better, double-click the ‘Layer Mask’ icon (the black and white thumbnail that showcases your selection). A window opens and offers a couple of options to refine the mask. ‘Mask Edge’ is identical to the ‘Refine Edge’ button in your toolbar, but the advantage of doing this in a ‘Layer Mask’ is that you can always modify things later, giving you better control.
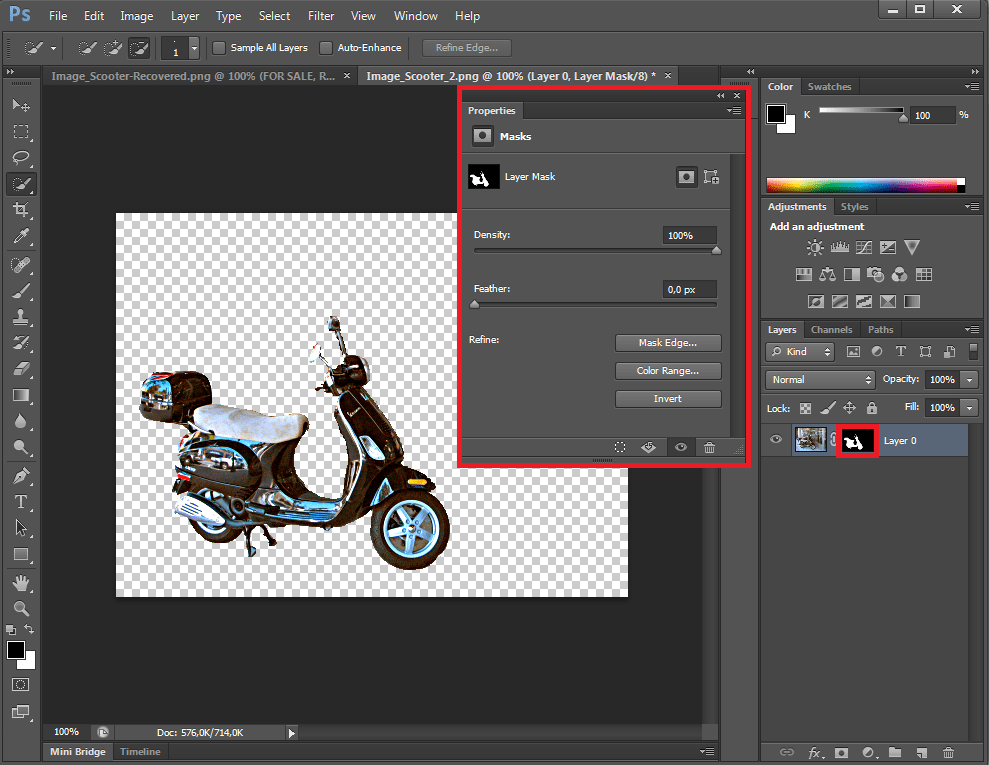
Click ‘Mask Edge’ and the ‘Refine Mask’ dialog opens, a handy feature to really refine everything.
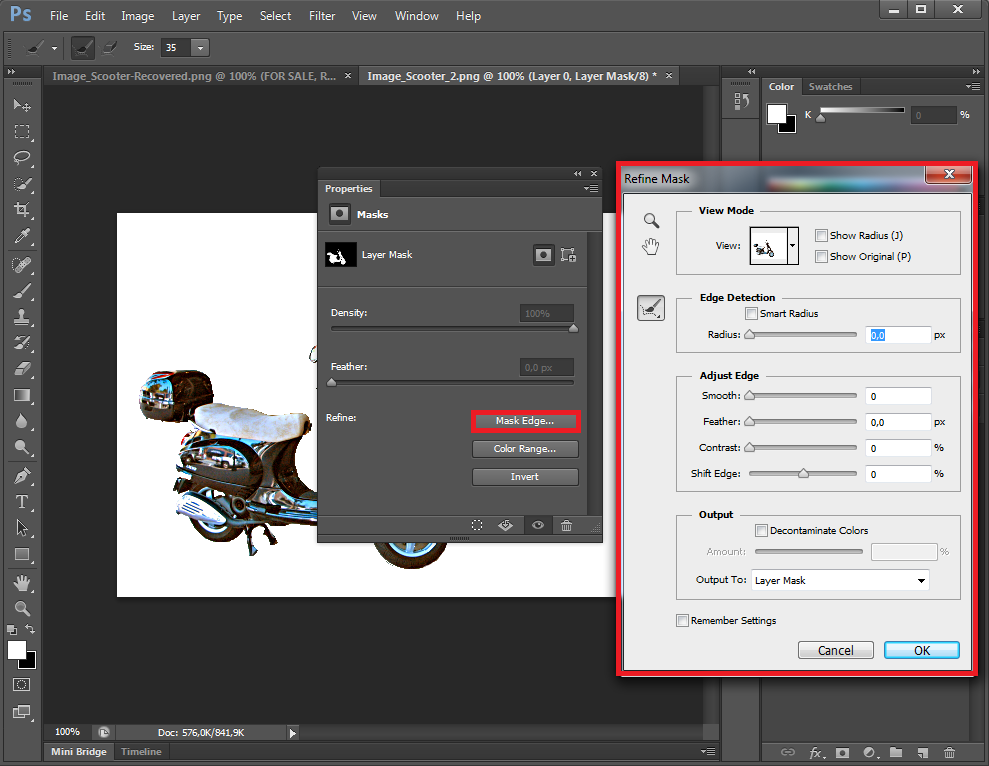
Click ‘View On layers’ in View Mode. Play around with the ‘Radius’ slider to make your edges look better. Also play around with the ‘Adjust Edge’ sliders. You want to keep ‘Smooth’ and ‘Feather’ rather low. ‘Contrast’ helps you to define the edges a bit better. Sometimes, you may need to ‘Shift Edge’ a bit. Another thing you can do is to work with the ‘Refine Radius Tool’ next to ‘Edge Detection’. If you click it and paint over your edges, it can help Photoshop to pay attention to those edges and it is handy to refine the edge selection that you previously made in those specific sections. If you select the ‘Show Original (P)’ box, you can see how your selection originally looked and what your changes did to it. To save the changes you made in your ‘Refine Mask’, click ‘OK’. As you can see, things already can look much better. You can further edit the mask to get the best result.
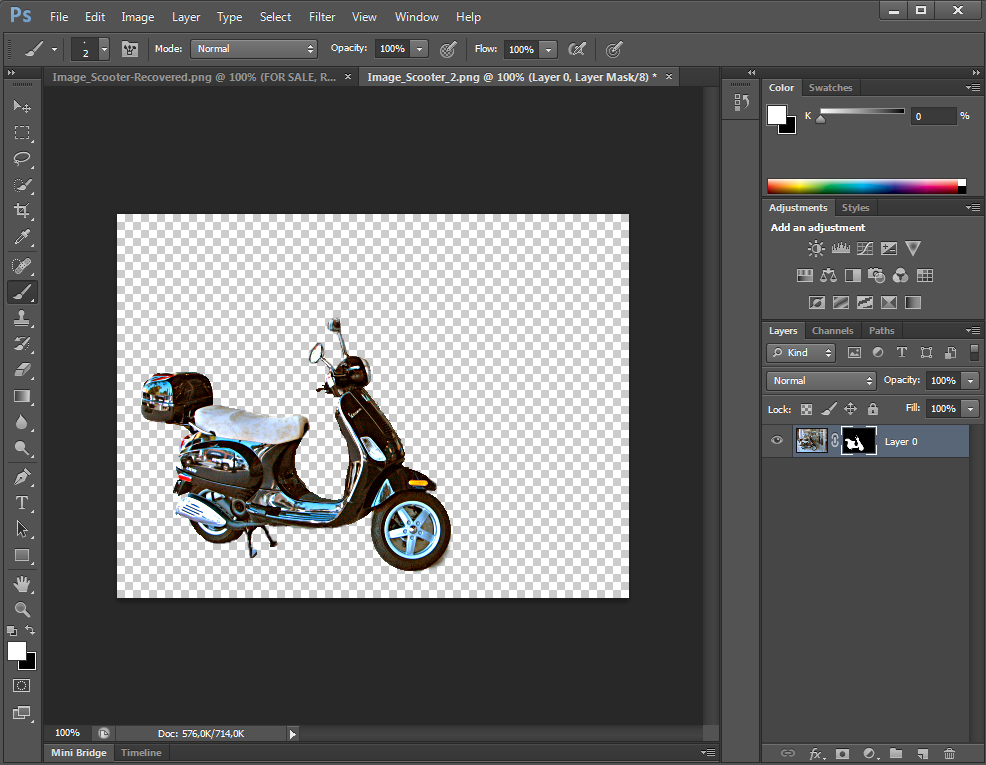
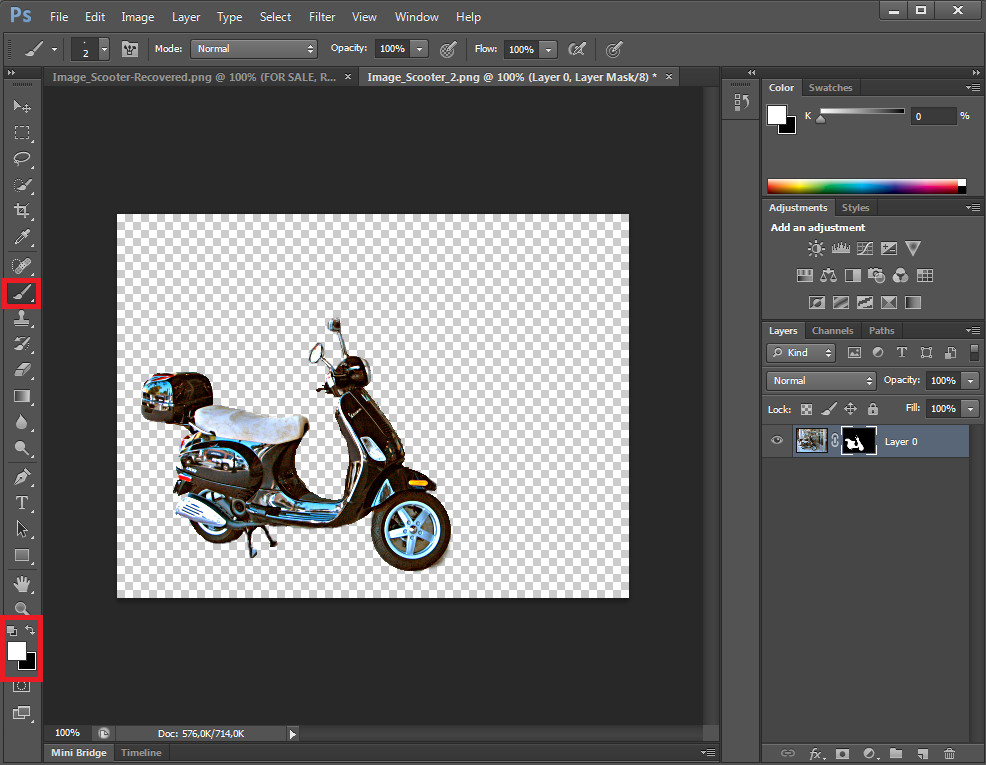
Afterwards, use the brush to make some final changes. You may want to delete or conceal certain areas. In this case, make sure that black is the color in the forground, click the ‘Brush Tool’ and paint over the area that you want to conceal. If you made a mistake in your selection and notice it only now, make sure that white is the color in the forground, click the ‘Brush Tool’ and paint over that specific area. With the ‘Brush’ tool you can thus really finetune things at the end.
To compare the ‘before’ and the ‘after’, right click your ‘Layer Mask’ icon and select ‘Disable Layer Mask’. You will now see the original image with your object or person in the original background. Richt-click your ‘Layer Mask’ icon again and select ‘Enable Layer Mask’ to see your object or person removed from the original background. There is also a shortcut for this. Press ‘Shift’ and then click your ‘Layer Mask’ icon to disable and enable it.
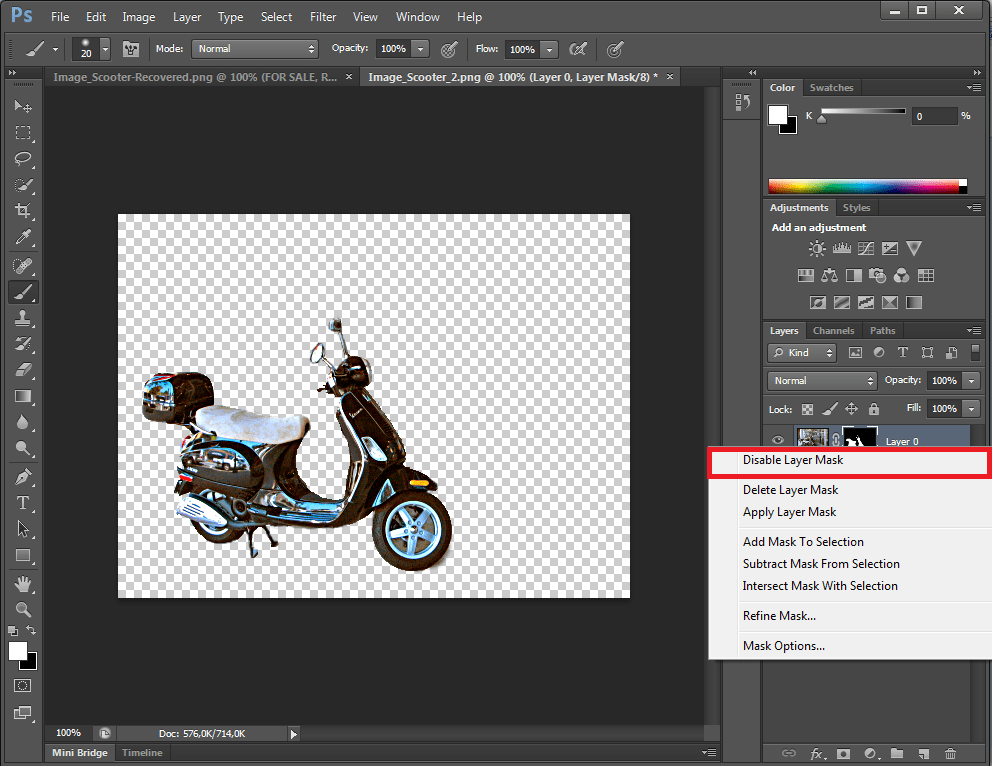
This is also a great part of working with a Mask. If you continued only with your selected area, the background would simply be removed. Masking definitely gives you much more control!


Thank you so much for your very in depth and easy to follow instructions. I am brand new to PS and I was able to remove an item, place it and create a shadow!