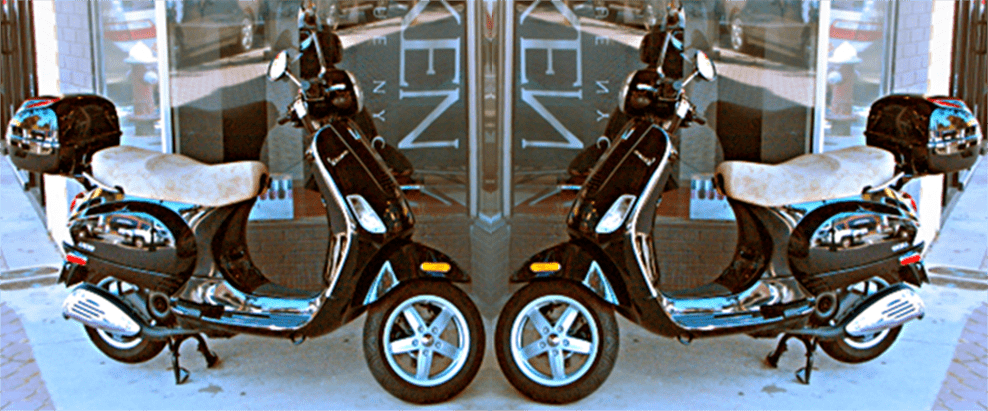
Create a Mirror Image Effect in Photoshop
Mirror an Image and Create a Mirror Image Effect in Photoshop.
In this tutorial, we will help you to simply mirror a certain image, flipping the image horizontally to the other side but we also help you in creating a mirror image effect, creating a reflection of the original image. You have seen this effect before. It is for example often used in movie posters and album covers. It is very easy to create. Check it out!
Summary: Mirror an image in Photoshop

Summary: Create a mirror image effect in Photoshop

More profound: how to mirror an image in Photoshop
Start by opening Photoshop. Click ‘File’ and then ‘Open’ to browse your computer to get the image that you want to mirror into Photoshop (or simply press ‘CTRL+O’ on your keyboard). Or you can browse your computer or external drive to find that specific image, right-click the image and select ‘Open With’ Photoshop.
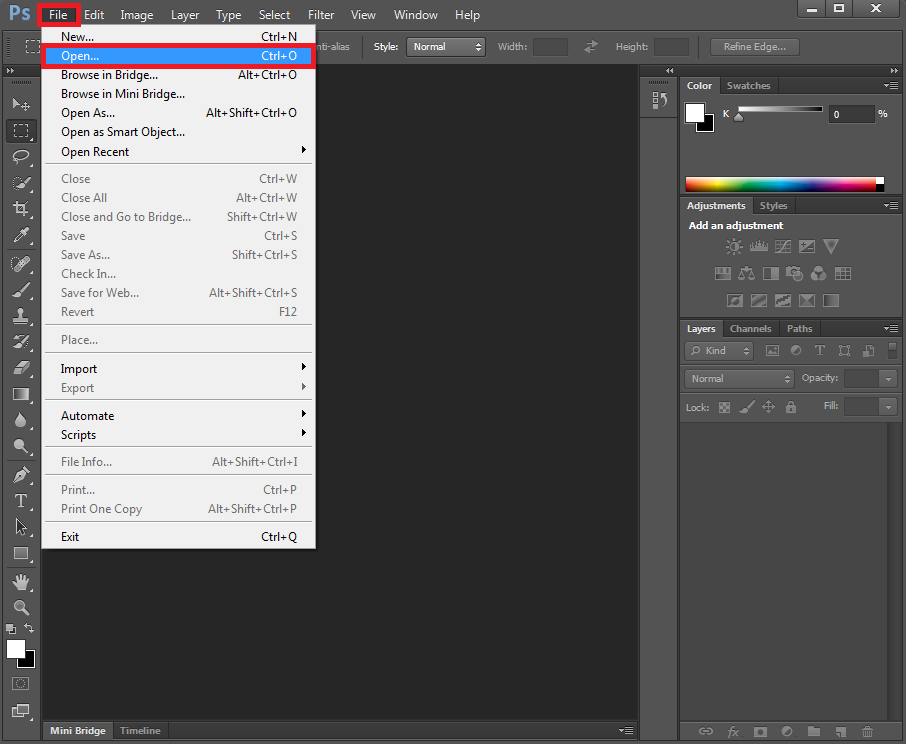
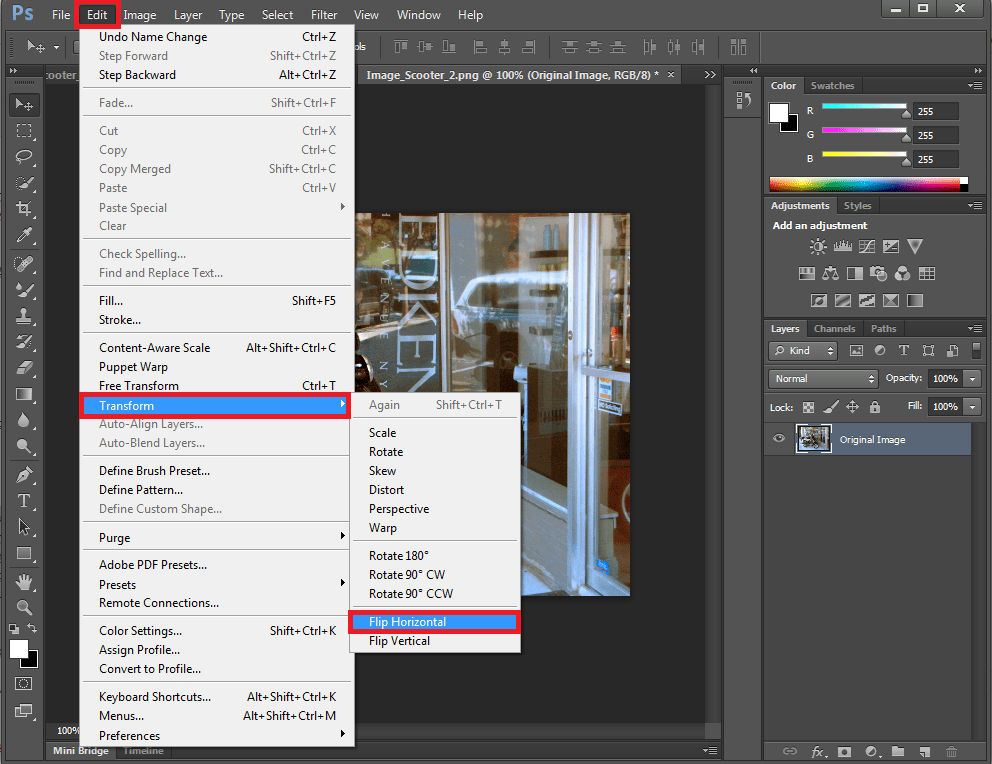
Edit the picture if you wish. To adjust the size of the image, click ‘Image’ and then ‘Image Size’ and play around with ‘Free Transform’ by clicking ‘Edit’ and then ‘Free Transform’ (or CTRL+T) to adjust size, tilt and placement. You can crop the image, e.g. if you only want to mirror the scooter. To find out how to crop images in Photoshop, click here. If you already have several layers in your ‘Layers Panel’, make sure to select the layer with your image. Click ‘Edit’, go to ‘Transform’ and click ‘Flip Horizontal’.(Flipping vertically will put an image upside down.)
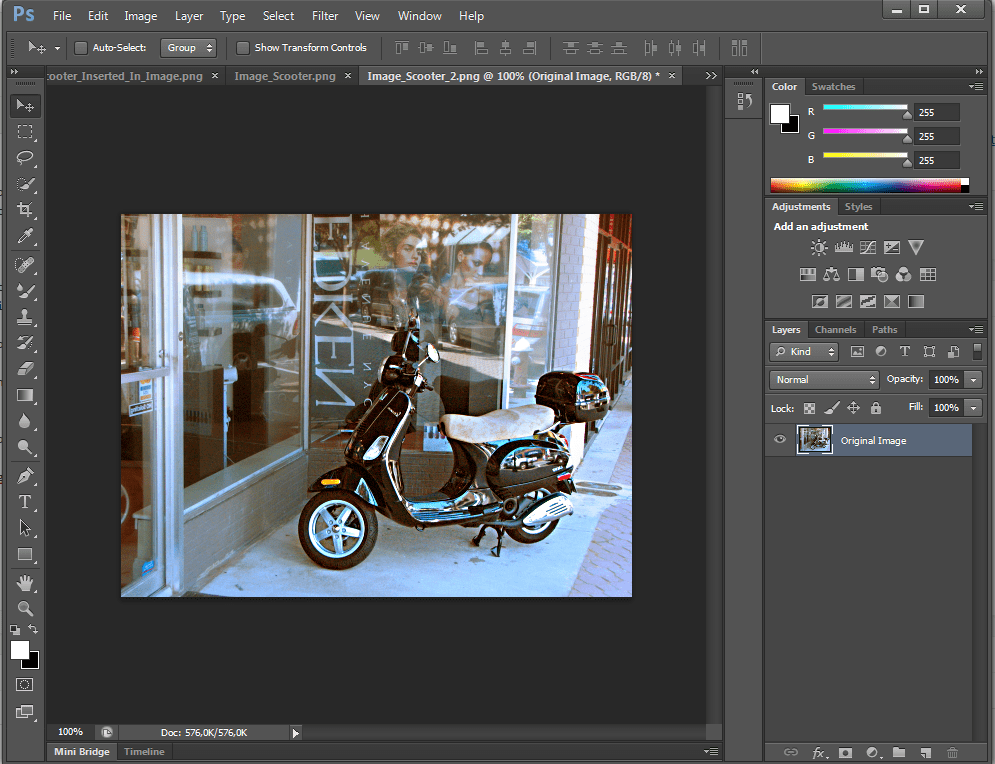
 Once you have flipped your image horizontally, you will see that the image with the scooter is no longer facing right, but it is mirrored left. The extra space is now on the other side.
More profound: how to create a mirror image effect in Photoshop
You now know how to mirror an image. If you want to create a mirror image effect in Photoshop, you do not only want to merely mirror your image, but you want both the original and the flipped image to appear mirrored. To get this effect, undo the mirror change. Edit the picture if you wish. To adjust size, click ‘Image’ and ‘Image Size’ and play around with ‘Free Transform’ by clicking ‘Edit’ and ‘Free Transform’ (or CTRL+T) to adjust size, tilt and placement. You can also crop the image, for example if you only want to mirror effect the scooter like we want to do. To find out how to crop images in Photoshop, click here. Right-click your original image layer and duplicate it.
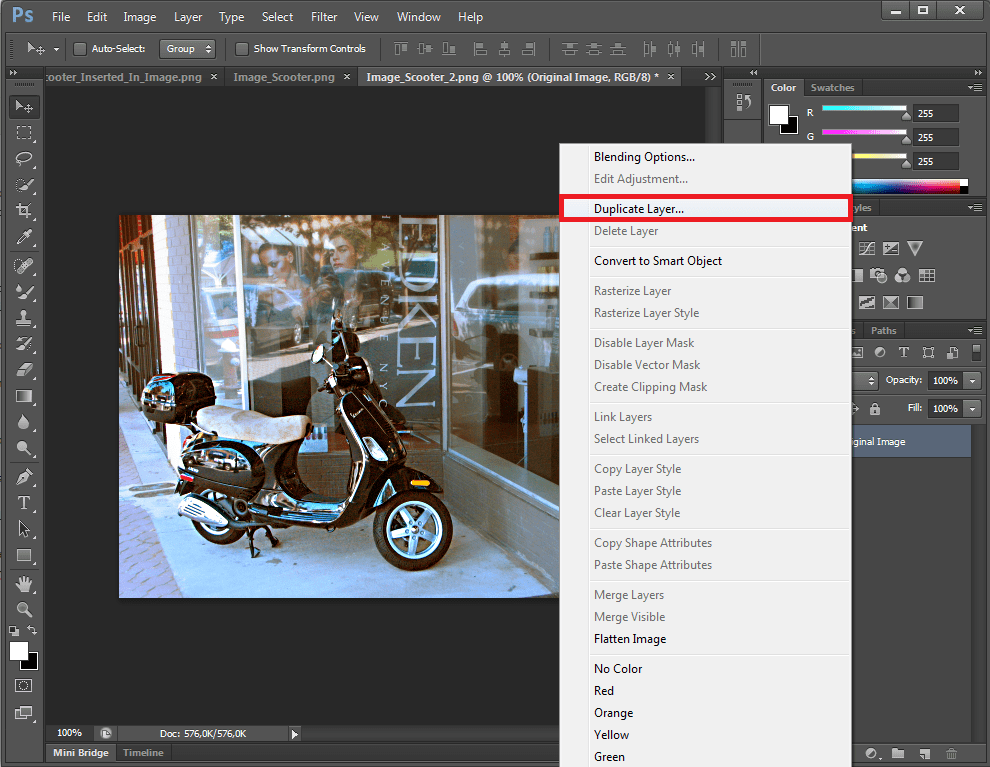
Drag the duplicated image next to your original image. In the ‘Layers Panel’, drag the Original Image Layer above the Duplicated Image Layer if you want this image on top and the other way around if you want the Duplicated Image Layer on top. As you will sometimes notice – like in our example – pictures appear too big to truly fit the screen. Don’t worry, it’s not because you don’t see the entire scooter, that it’s not there (more on this in the following paragraph).
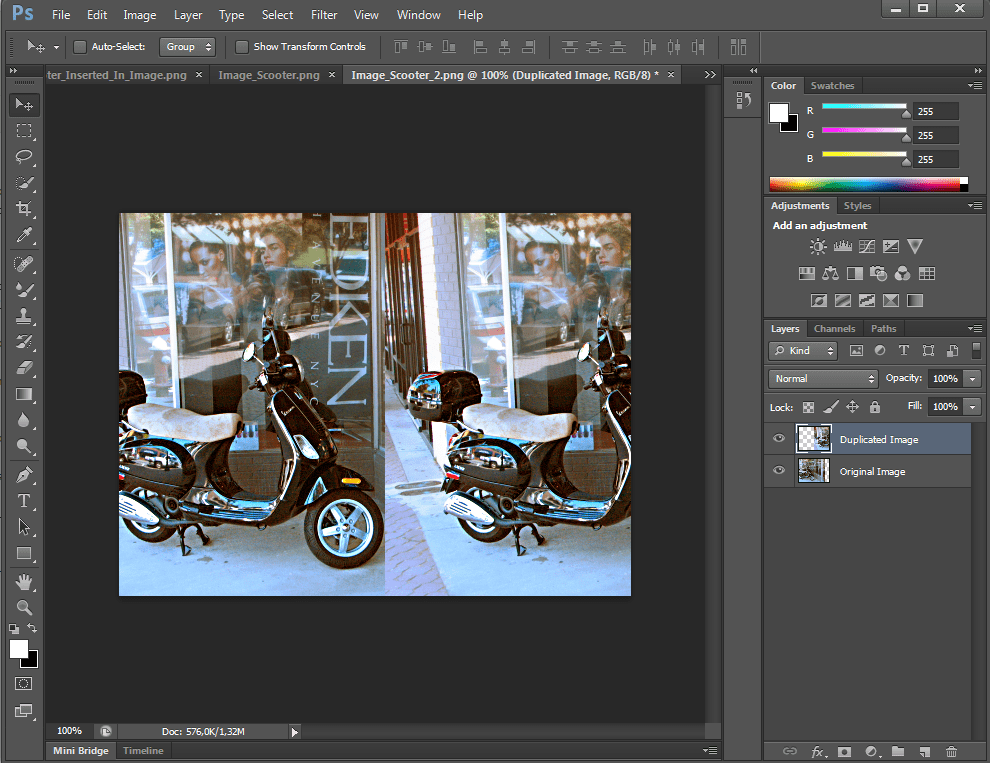
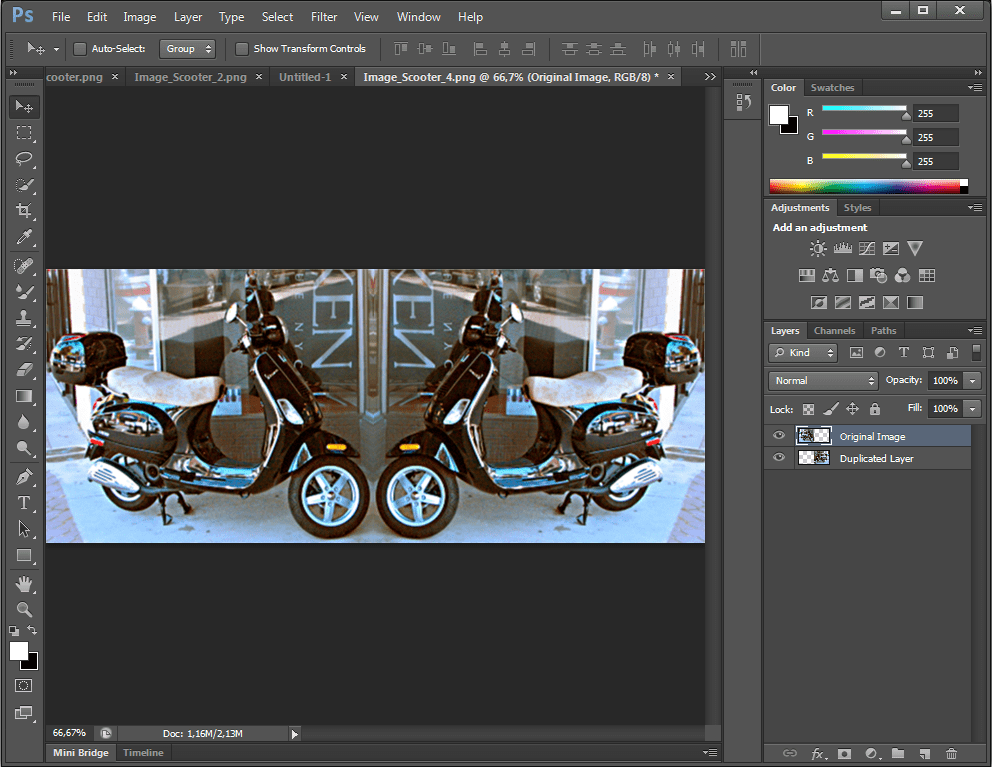
Now flip the duplicated image horizontally. Click ‘Edit’, go to ‘Transform’ and click ‘Flip Horizontal’. Make sure to have the duplicated layer selected when you do this. If you want the entire scooter mirrored and not just the front piece that is visible, click the ‘Crop’ tool in the list left in Photoshop and you will see that you can select the entire scooter in both layers to be cropped. For more information about cropping images, click here.
You now have created a mirror image effect in Photoshop!
Summary: Mirror an image in Photoshop

Summary: Create a mirror image effect in Photoshop
