Add a header in Word
Add a Header in Word
A header appears in the top margin of a Word document. Headers normally contain information such as dates, an author’s name, a title of a publication, etcetera. The information that is entered in the header appears on each page of your document. A header with important basic information makes longer documents such as papers or a thesis organized, more professional and easy to read. Word offers various preset headers that you can use. In the following tutorial, we explain how you can add a header in Word and how you can edit it.
Tutorial
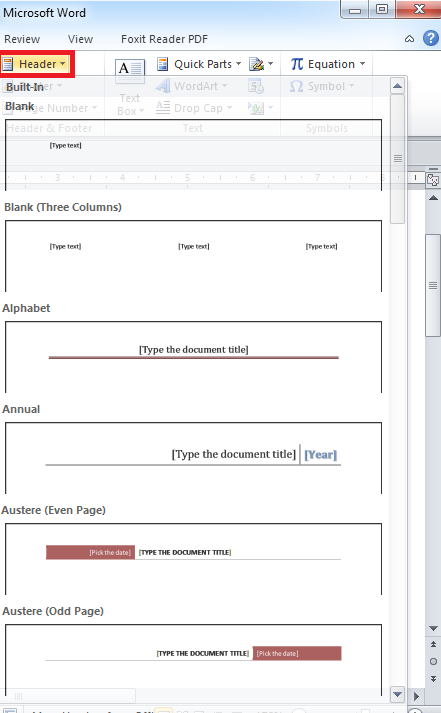
Click the ‘Insert’ tab. Click ‘Header’ to add a header in Word (or click’Footer to add a footer in Word. The process to add and edit a footer is exactly the same as adding a header. A footer simply appears in the bottom margin of a Word document.)
  In the menu that opens, select the desired preset header. As an example we take the second preset header.
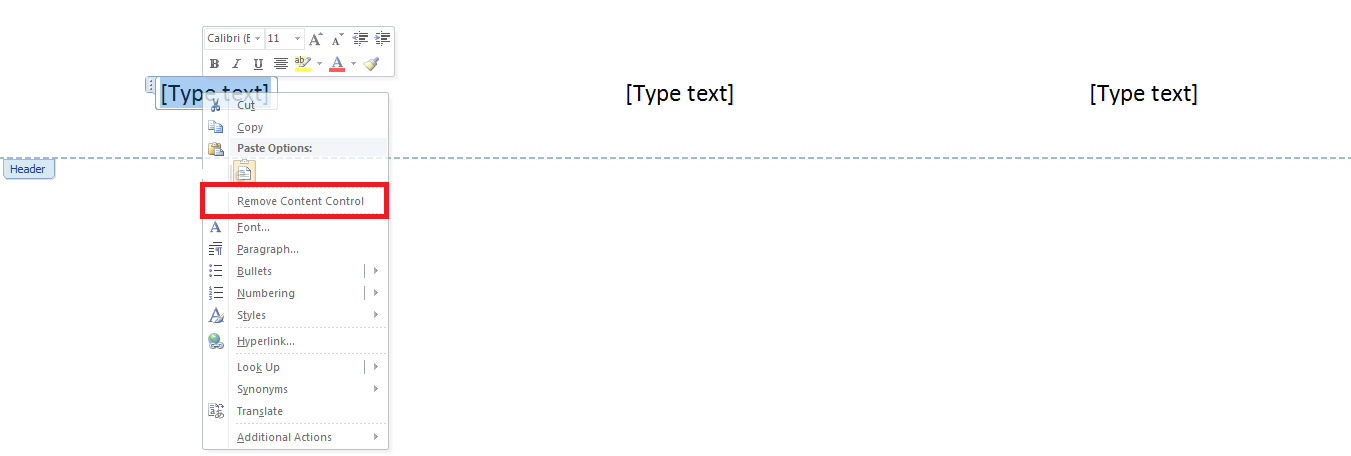
  The header will appear in your Word document. The preset header contains three placeholders for information such as a date, a title and an author.
  To edit the fields, click a field. Type the information that you want to showcase in that specific field and do the same for the other fields.
 If you don’t want three fields, you can simply delete fields by using your backspace or your delete button on your keyboard and continue with merely two fields or one field. You can also delete a field by right-clicking it and then select ‘Remove Content Control’ from the menu that opens. Of course, you can also select another preset header that better meets your needs.
  You now know how to add a header in Word and how to edit it. When you’re finished, click ‘Close Header and Footer’. Alternatively, you can press the Esc key or simply double-click in your document itself.
  After you close the header, the information will still be visible on every page but the header will be locked. Double-click your header to unlock it again, which will allow you to edit its content.
