Change Page Margins in Word
Change Page Margins in Word
Page margins are the blank spaces around the edges of a Word document. You can change a document’s page margins, meaning that you change where text and graphics appear on the pages in the document. You can change the page margings by choosing between one of the predefined settings of Word in the Margins gallery or you can create your own custom margins.
Tutorial
Change Page Margins using Predefined Settings
Click the ‘Page Layout’ tab in Word.

In the ‘Page Setup’ group, click ‘Margins’.

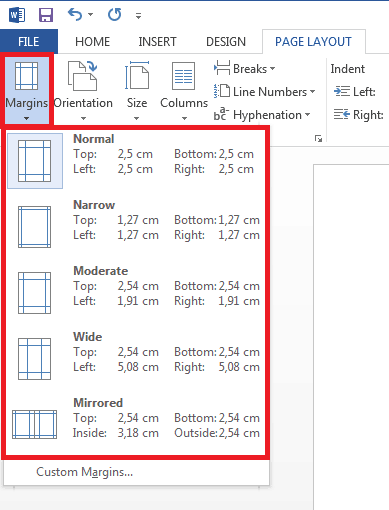
The ‘Margins Gallery’ appears. Click the predefined margin type that you want to apply. If your Word document has multiple sections, the newly chosen margin type will only be applied to the current section. If your Word document contains multiple sections and you have selected multiple sections, the newly chosen margin type will be applied to each section that you have selected.

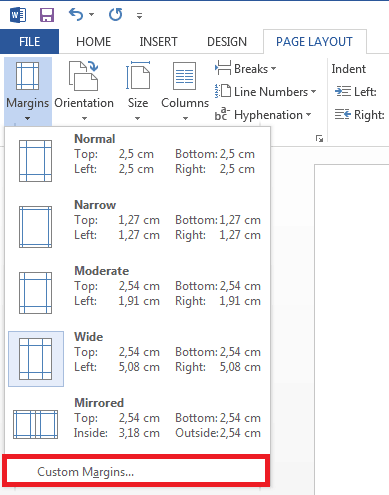
To change the default margins, click ‘Margins’ again after you have selected your new margin type e.g. ‘wide’. Then click ‘Custom Margins’.

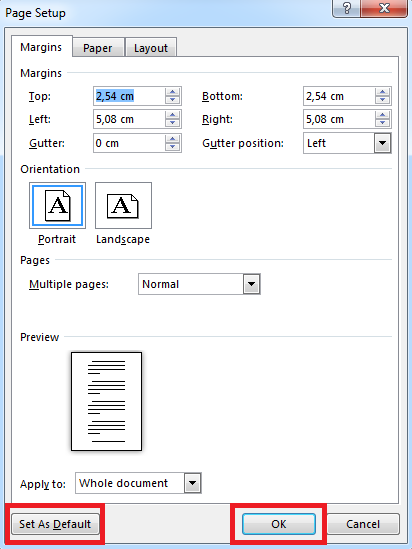
A ‘Page Setup Dialog Box’ will open. Click ‘Set as Default’ to make sure that each new document based on that template automatically uses the newly chosen margin settings.

Change Page Margins using Custom Page Margin Settings
Click the ‘Page Layout’ tab in Word.

In the ‘Page Setup’ group, click ‘Margins’.

The ‘Margins Gallery’ appears. Click ‘Custom Margins’.

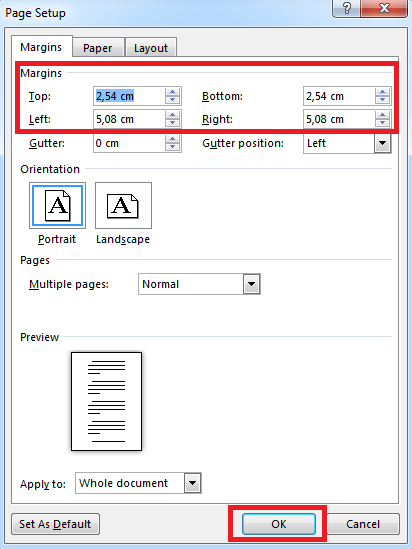
A ‘Page Setup Dialog Box’ will open. Enter new personally chosen values for the margins. Click ‘Set as Default’ if you want to. Click ‘OK’ to end.


