Color adjustment with levels in Photoshop
Sometimes, the color balance of a picture is simply wrong. Working with ‘Levels’ in Photoshop is a quick way to adjust and correct the color balance of an image. ‘Levels’ can provide powerful color correction tools. In the following tutorial, we gladly explain how you can adjust the color of an image with ‘Levels’ in Photoshop. As you can see, the following example picture is very cold and blue.

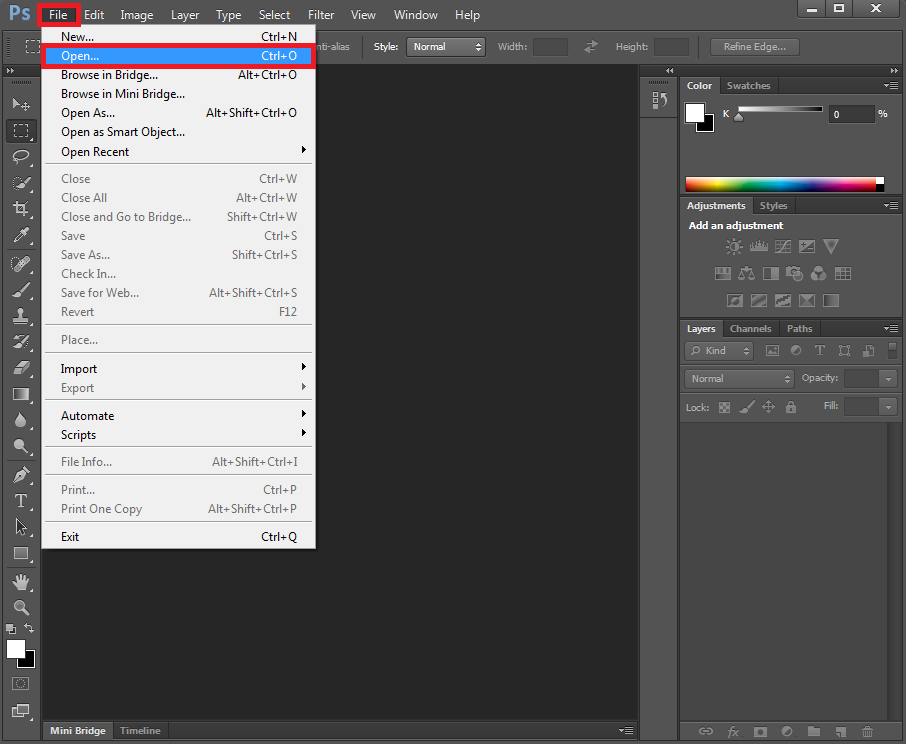
You definitely want to adjust and improve the color. Start by opening Photoshop. Click ‘File’ and then ‘Open’ to browse your computer to get the picture into Photoshop (or browse your computer or external drive to find the image that you want to edit, right-click the image and select ‘Open With’ Photoshop).

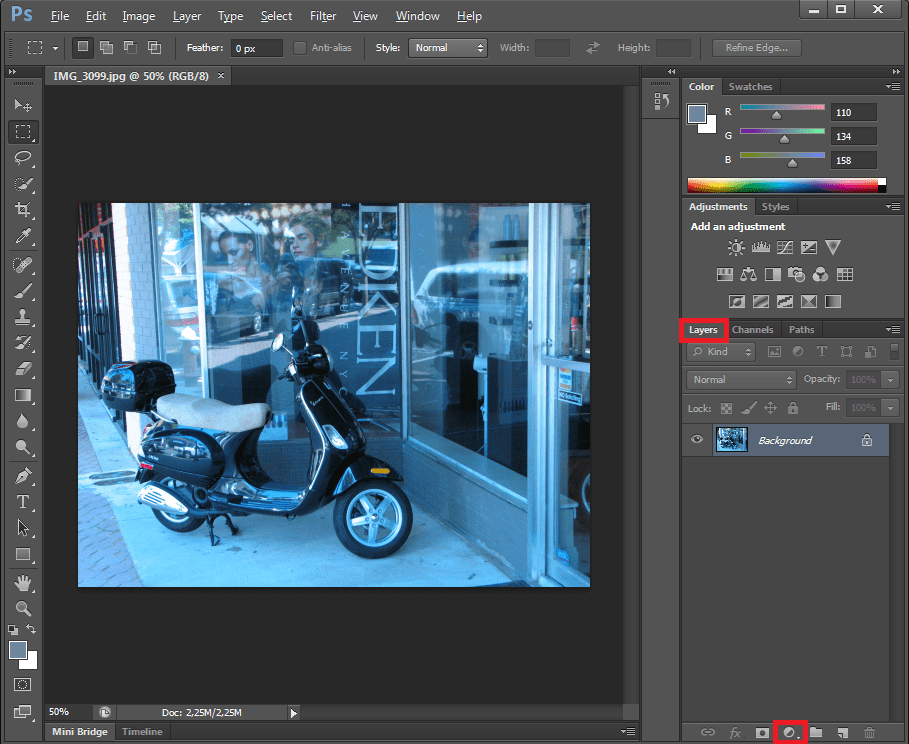
To adjust color with ‘Levels’, open your ‘Layers’ panel and click the black and white circle.

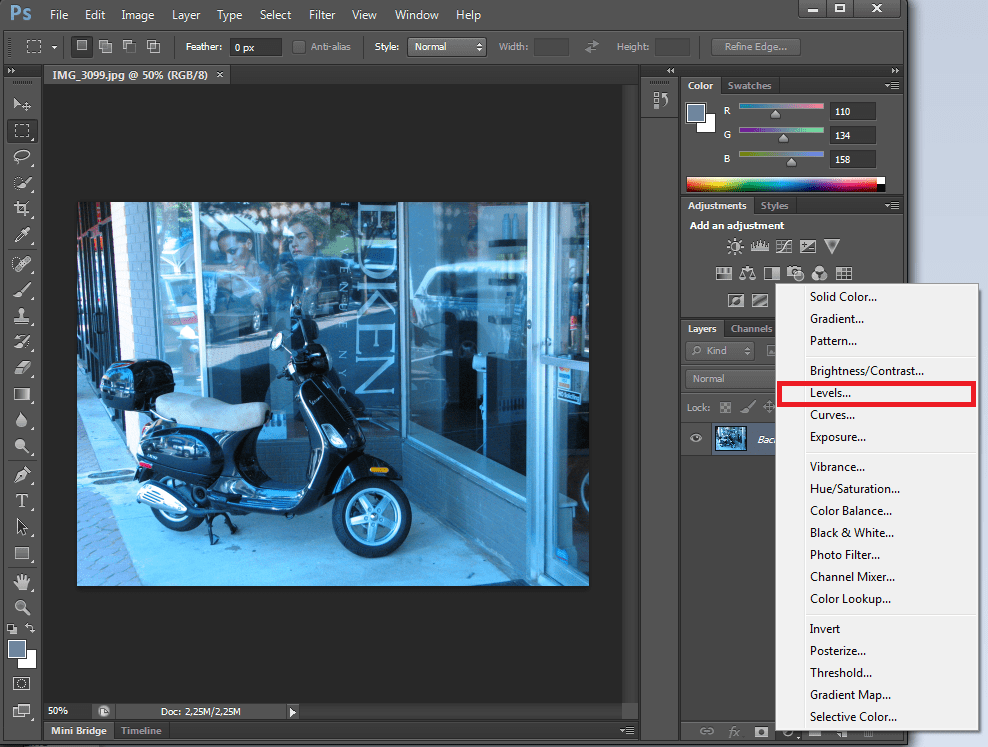
Click ‘Levels’.

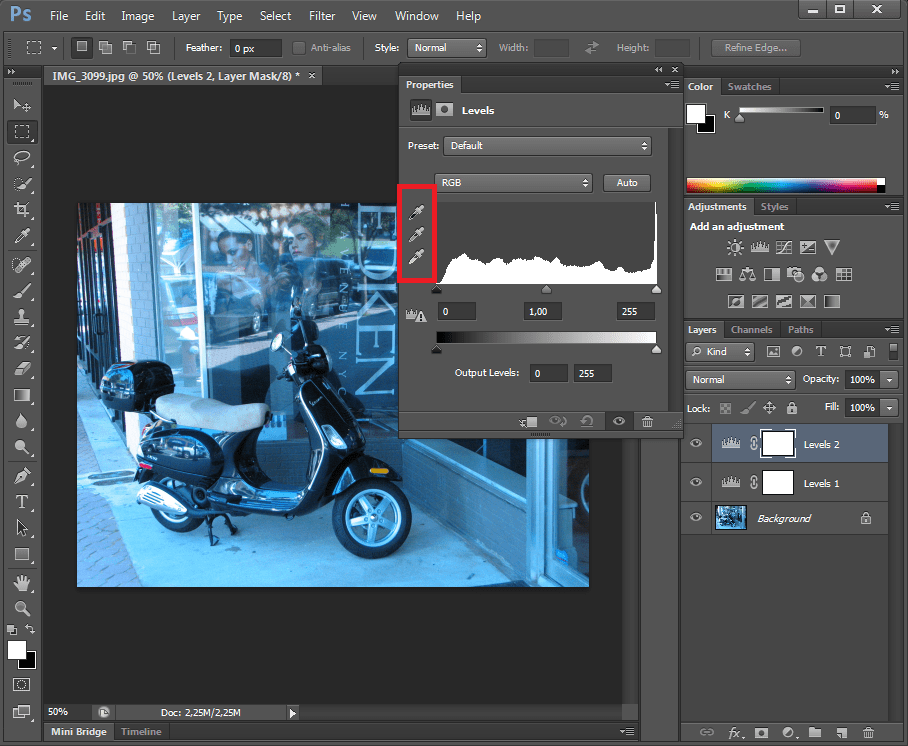
Bring up the ‘Adjustment’ window that opens up and get started. You see three ‘Eyedropper Tools’. You’ve got a black picker (top eyedropper), a grey picker (the middle eyedropper) and a white picker (bottom eyedropper).

Click the white picker and then click a white area in your picture. You can see your picture already change. You can also click the black picker and click a black area in your picture. Play around to get the best result. In case you do not have black or white in your picture, there usually will be some grey area in the scene. Click the grey picker and click a grey area in your picture. Simply play around with all these three ‘Eyedroppers Tools’ to adjust the color of your picture. As you can see, when we play around with these pickers, the colors in the example picture become much better. Note that you can also play around with ‘Opacity’ in the ‘Layers’ panel to make some final color adjustments.

Your colors are now adjusted using ‘Levels’ and the ‘Eyedropper Tools’. The picture immediately looks much warmer and far more realistic.
 You definitely want to adjust and improve the color. Start by opening Photoshop. Click ‘File’ and then ‘Open’ to browse your computer to get the picture into Photoshop (or browse your computer or external drive to find the image that you want to edit, right-click the image and select ‘Open With’ Photoshop).
  To adjust color with ‘Levels’, open your ‘Layers’ panel and click the black and white circle.
  Click ‘Levels’.
  Bring up the ‘Adjustment’ window that opens up and get started. You see three ‘Eyedropper Tools’. You’ve got a black picker (top eyedropper), a grey picker (the middle eyedropper) and a white picker (bottom eyedropper).
  Click the white picker and then click a white area in your picture. You can see your picture already change. You can also click the black picker and click a black area in your picture. Play around to get the best result. In case you do not have black or white in your picture, there usually will be some grey area in the scene. Click the grey picker and click a grey area in your picture. Simply play around with all these three ‘Eyedroppers Tools’ to adjust the color of your picture. As you can see, when we play around with these pickers, the colors in the example picture become much better. Note that you can also play around with ‘Opacity’ in the ‘Layers’ panel to make some final color adjustments.
  Your colors are now adjusted using ‘Levels’ and the ‘Eyedropper Tools’. The picture immediately looks much warmer and far more realistic.

