Crop Images in Photoshop
Crop images in Photoshop.
Cropping refers to the removal of unwanted areas or irrelevant sections from a picture to improve the overall composition or to accentuate a certain section. It is one of the most basic photo manipulation processes there is and one of the few editing actions that is totally permitted in modern photojournalism, along with colour correction, sharpening and tonal balance. In the following tutorial we show you how you can crop pictures in Photoshop and how to crop them to a certain size.
Cropping images and cropping images to a certain size
To crop images in Photoshop, start by opening Photoshop. Click ‘File’ and then ‘Open’ to browse your computer to get the image that you want to crop into Photoshop (or browse your computer or external drive to find that image, right-click the image and select ‘Open With’ Photoshop).
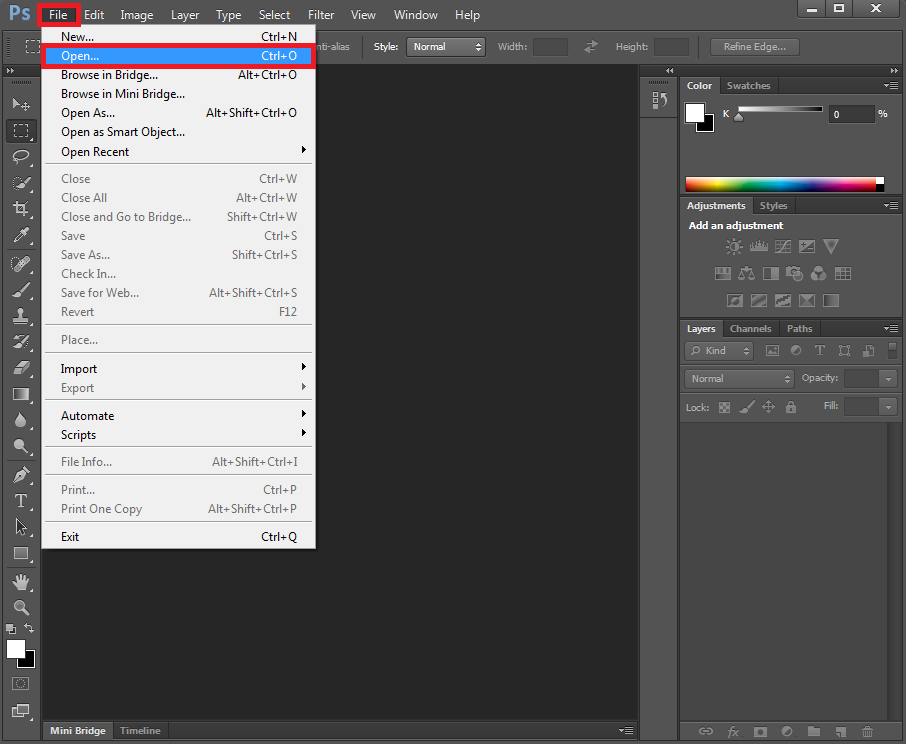
Cropping an image
There are several reasons why you want to crop an image. You for example want to sell your scooter, so you don’t care about the surroundings. You simply wish to accentuate the scooter and therefore want to show it cropped. Merely cropping an image in Photoshop without any further specifications is quite easy. Simply click the ‘Crop’ button in the button list left. You might have several images that you are working with in Photoshop. In that case, make sure to click the ‘History’ button on the right. In the menu that opens, click the tab with the image that you wish to crop. Or look at the ‘Layers Panel’ and click the correct layer.
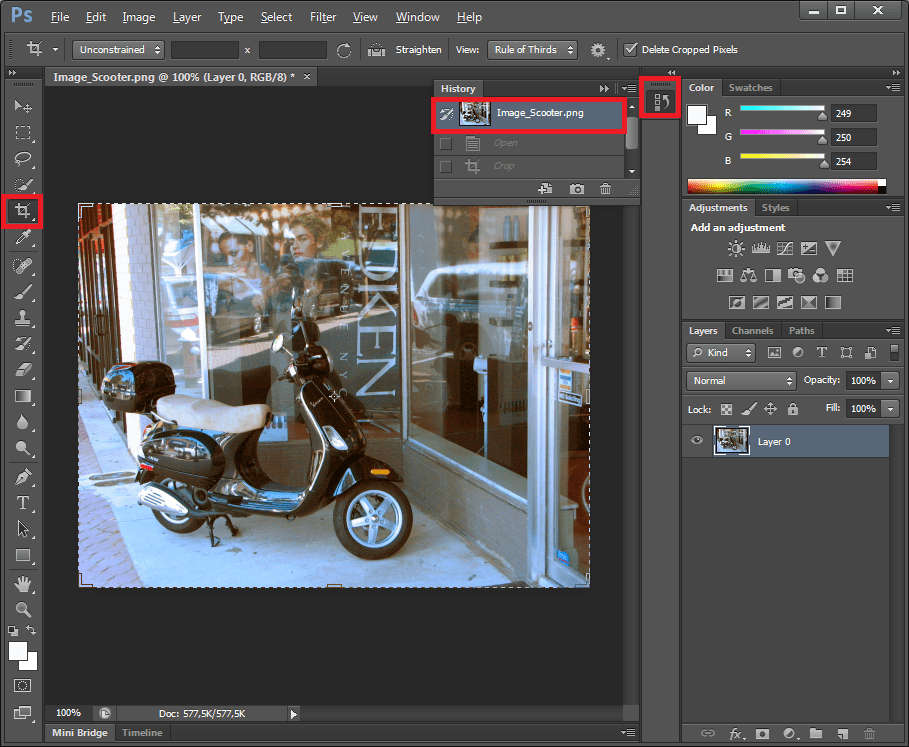
Select the section of your image that you wish to see cropped. Move the image around if necessary. Double-click the image to allow cropping or right-click it and select ‘crop’.
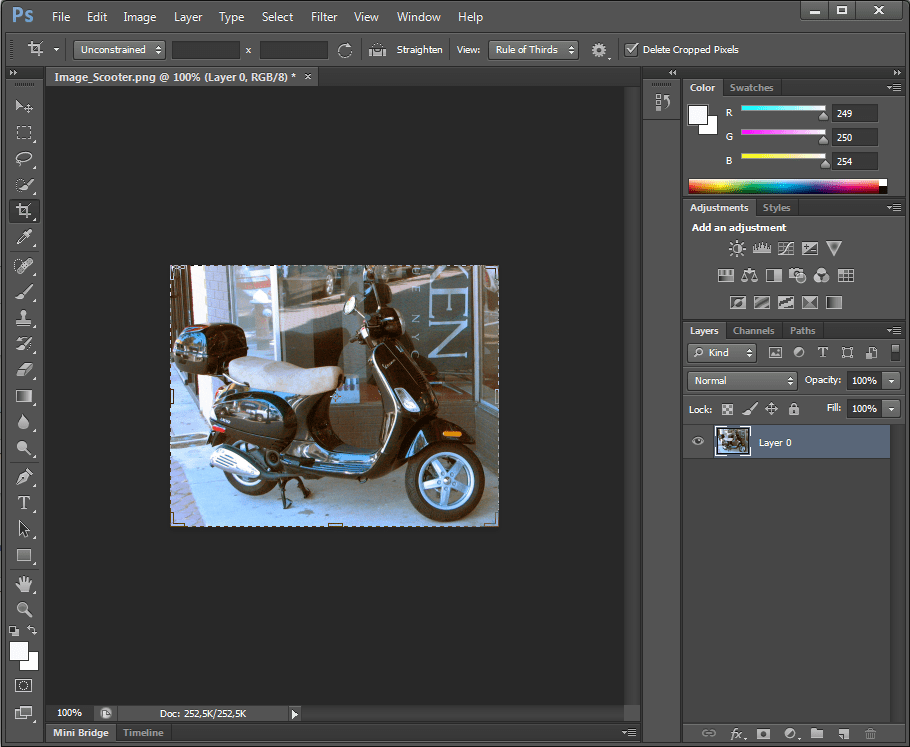
Your image is now cropped.
Cropping an image to a certain size
You may want to crop your image to a certain size. You may for example need to resize your image to a standard print and frame size like 8×10 inches or you want your image to be cropped into a square. To crop an image to a certain size, make sure you first click the ‘Crop’ button. Click the ‘History’ button on the right and in the menu that opens, click the tab with the specific image that you want to crop to a certain size (or click the correct layer in the ‘Layers Panel’).

As you can see in the crop toolbar, Photoshop offers some predefined size options that you can use for cropping an image to a certain size. Click ‘Original Ratio’ and select a size in the list that opens. If your desired size is not shown in the list, simply type in the desired width and height of your image in the two sections next to the list button.
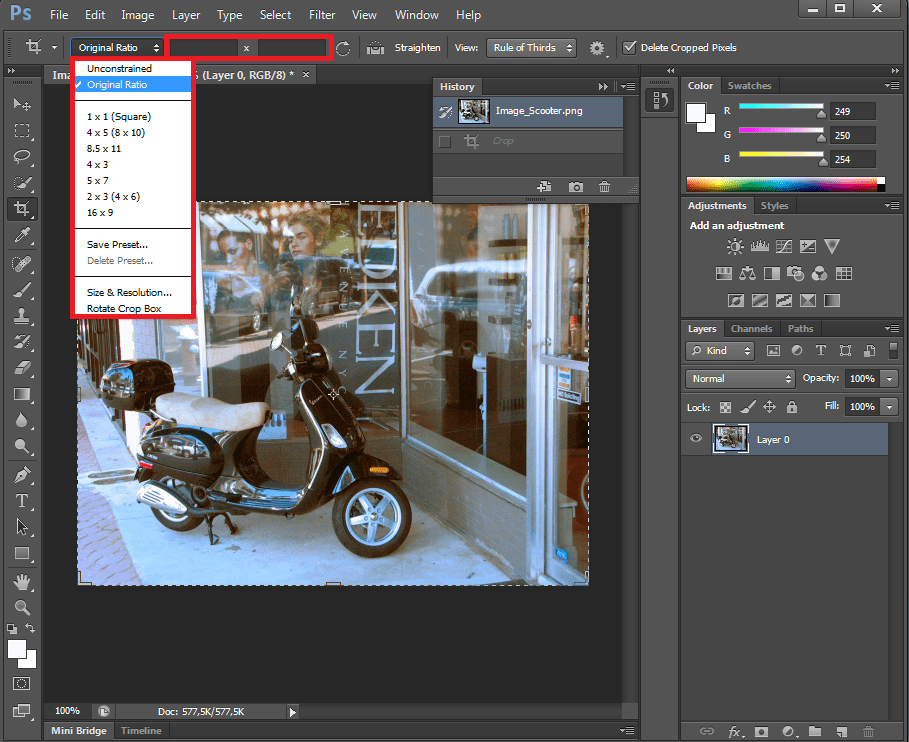
If you for example want your picture to be cropped as a square, select the ‘1×1 (square)’ option in the list that opens after clicking ‘Original Ratio’. Move your image a bit to the left or to the right to make sure that the object or area in your image that you want to accentuate, in this case the scooter, is cropped correctly without cutting some pieces off. Double-click the image to crop it to the selected or typed in size.
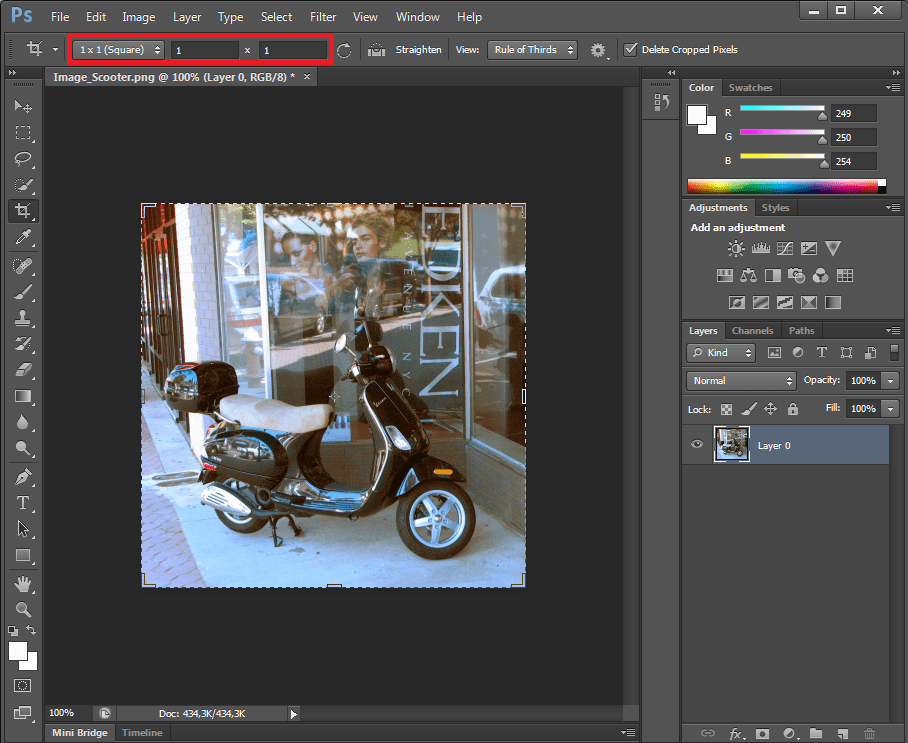
In our example, our scooter is now nicely cropped to a square. Easy as that!

