Make a Postcard in Word
Make a postcard in Word.
Word offers the possibility to make postcards. Postcards are very useful for businesses and organizations. They can be used for invitations, leaflets, business cards, etcetera. In the following tutorial we help you to make a postcard in Word, starting from a Word template.
Tutorial
To make a postcard in Word, you have to start a postcard project. Click the ‘File’ tab in Word.

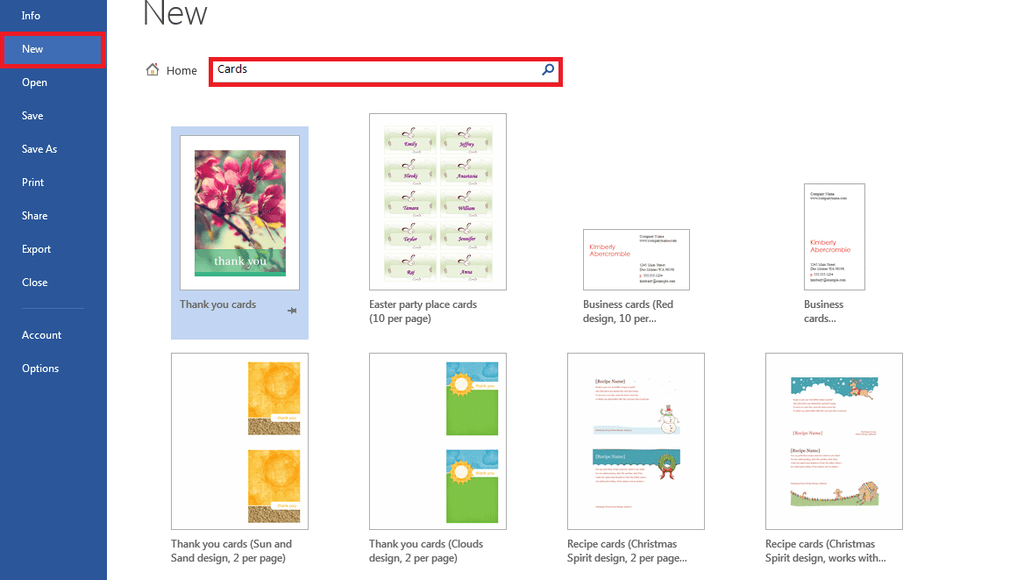
Click ‘New’ and then click ‘Cards’.
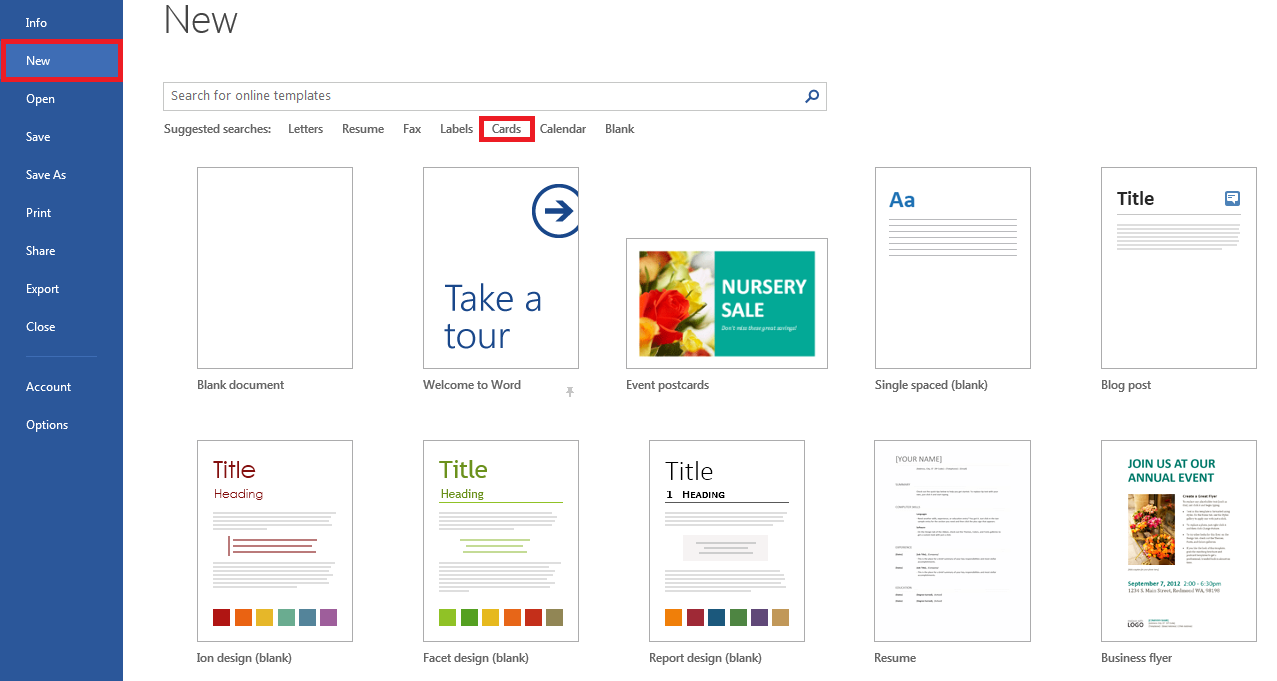
As you can see after clicking ‘New’ and then ‘Cards’, Word offers various options in the ‘card’ category. Pick the template you like the most that has the layout that matches your design goals. As an example, we click ‘Business Card Bamboo’. Click the ‘Download’ button or the ‘Create’ button in newer versions of Word.
The template will open in Word. You see several template cards in one Word document.
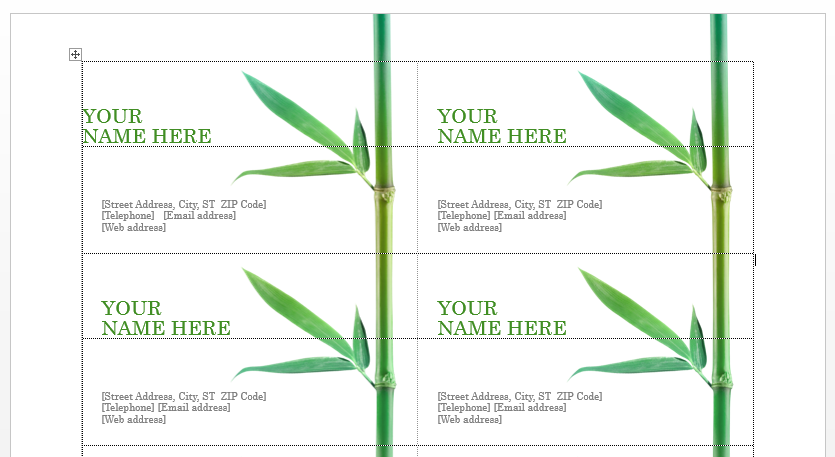
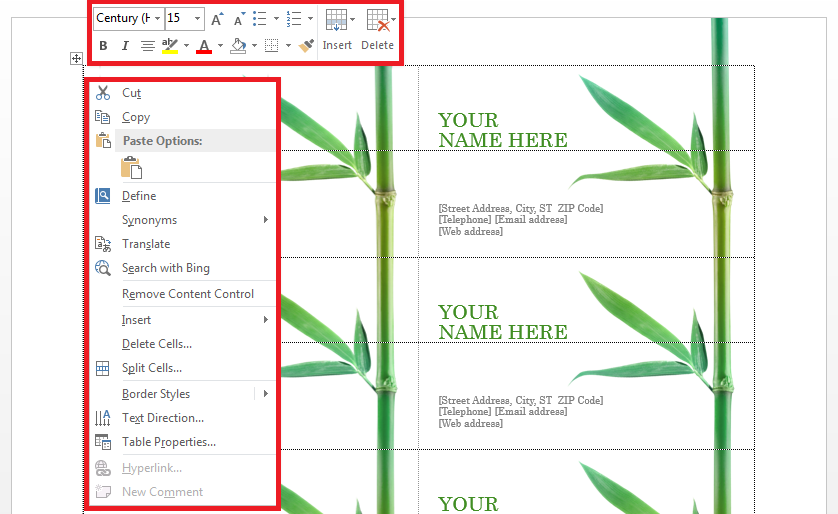
If you use a Word template like in our example, you won’t have to worry about placement. The template guarantees that all your elements will match up for printing. You merely have to worry about the actual content of your postcard. Start editing the text. Simply click on the areas where you see the sample text and enter what you want in that area. Right-click the text to edit font, size and style. If you right-click the text, you can also define a certain border style, you can change the text direction, etcetera. If you change the text in one sample card, all the other cards will change as well. You don’t have to edit each card seperately.
A good postcard uses relevant and striking visuals, so don’t refrain from adding images to your card. If there is a default image in the template, click the image and hit backspace to delete it. To add an image, start by clicking the ‘Insert’ tab.

Click ‘Pictures’.

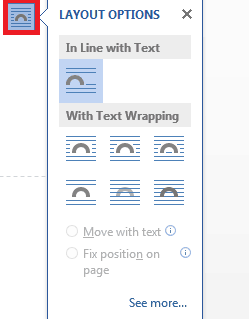
You can then browse your computer to find the picture that you wish to add to your card. Adjust the placement and size of the image to fit the template. Try the options in the Text Wrap panel that appears when you have added your image. If you are making a business postcard, you definitely want to add your company logo as well. It implies the exact same process as adding an image. Click the ‘Insert’ tab, click ‘Pictures’ and browse your computer to add your logo. Adjust the placement and size of it and play around with the various Text Wrapping options. A logo does not need to have a transparant background, since Word has a feature to ‘Remove Background’. However, it is for sure easier to work with a file that does not require further altering.
You can customize your postcard further. Templates are a combination of shapes and you can easily edit shape areas by double-clicking them. Choose between various fills, outlines and special effects in the ‘Drawing Tools Format’ tab. You can for example change the look and feel of your card by applying different textures, patterns, gradients and by adjusting the weight and color of shape’s borders, …

Once you have finished with editing the front, you can focus on the back of your postcard. The techniques for editing the back are exactly the same as what you did for the front. If you are ready, click the save icon at the left corner of every Word document or simply hit CTRL S on your keyboard. Saving in the PDF format is definitely recommended, because this is easier for sharing and it will make sure that nothing changes in your layout when you start printing your card
Don’t know how to save a Word document as a PDF? Click here.
