How to Censor/Pixelate in Photoshop
Sometimes you need to pixelate a face (or other parts of the human body) and objects, mostly for ethical and privacy reasons. Whether the censoring technique is used to blur out the features (facial or other parts) of adults to preserve their privacy and integrity or to ethically protect those who are underage, or to blur out a car number or street name, Photoshop is always your answer. In this tutorial, we show you the quick and easy way to censor your images, using the Pixelate filter. Check out how we censored the face of Homer. No Marge, it’s not him eating that donut!

Summary: how to censor/pixelate in Photoshop: a face, body part or object
More profound: how to censor/pixelate in Photoshop: a face, body part or object
To censor/pixelate in Photoshop, start by opening Photoshop. Click ‘File’ and then ‘Open’ to browse your computer to get your image into Photoshop (or simply press ‘CTRL+O’ on your keyboard). Or you can browse your computer or external drive to find your image, right-click the image and select ‘Open With’ Photoshop.

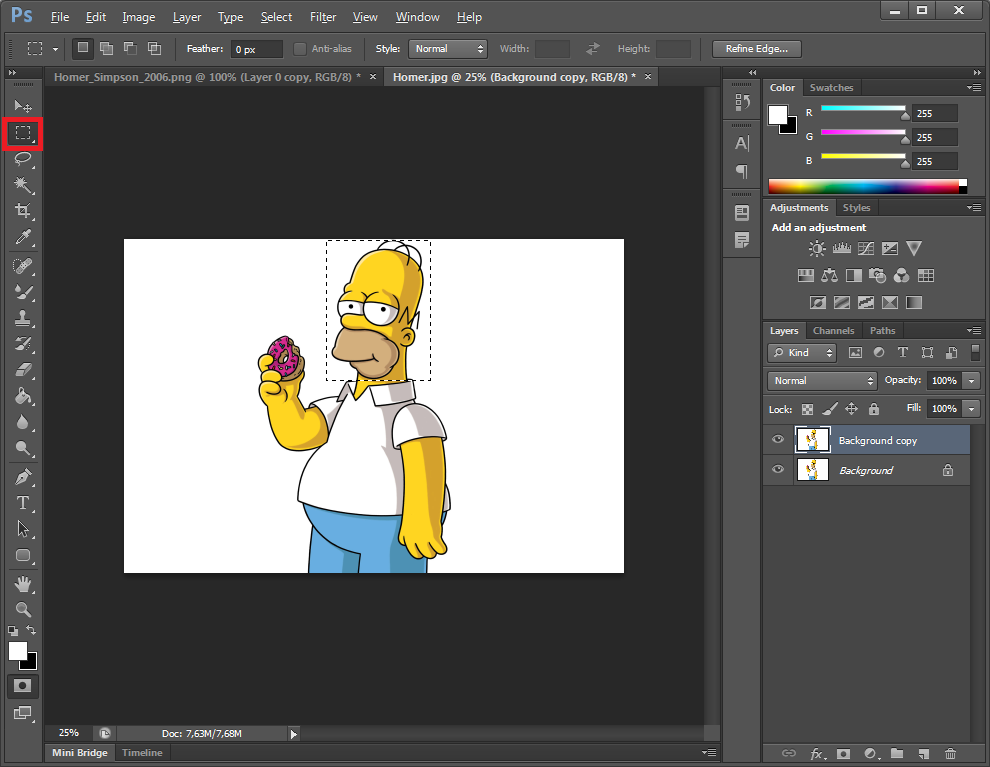
Select the part of the image that you want to censor. In our case, Homer can not get cought eating a donut because he is on a diet. He wants his face pixelated (Yeah right Homer, no one will know it’s you!). Select his face using the ‘Rectangular Marquee Tool’ (M). 
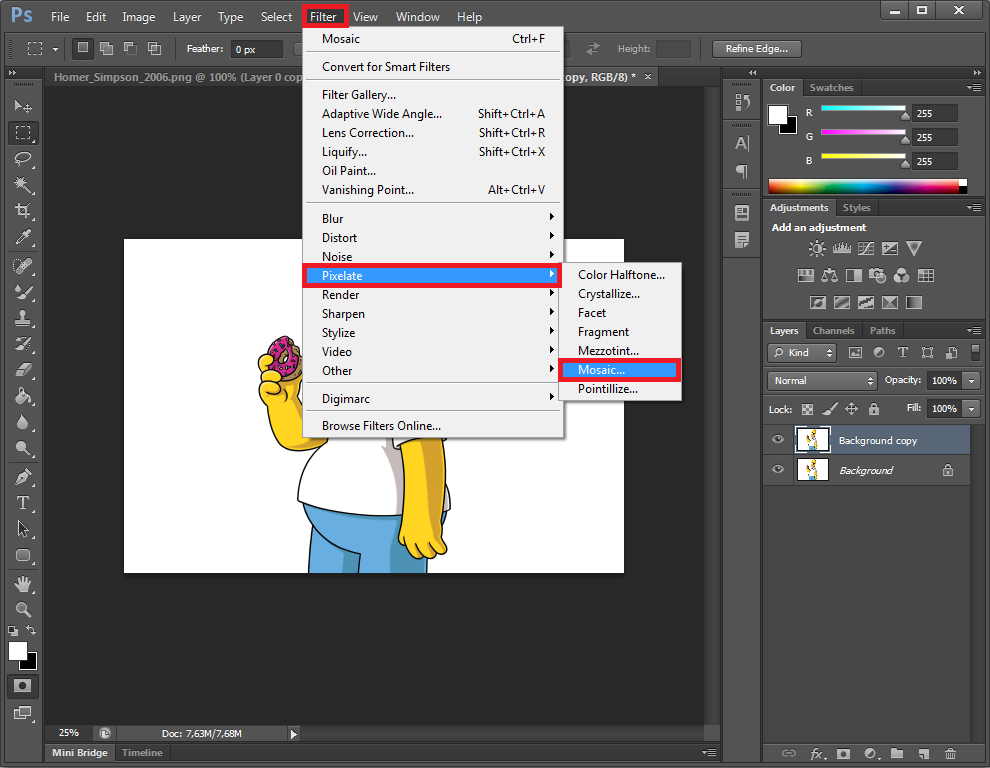
Click ‘Filter’, select ‘Pixelate’ and select ‘Mosaic’.

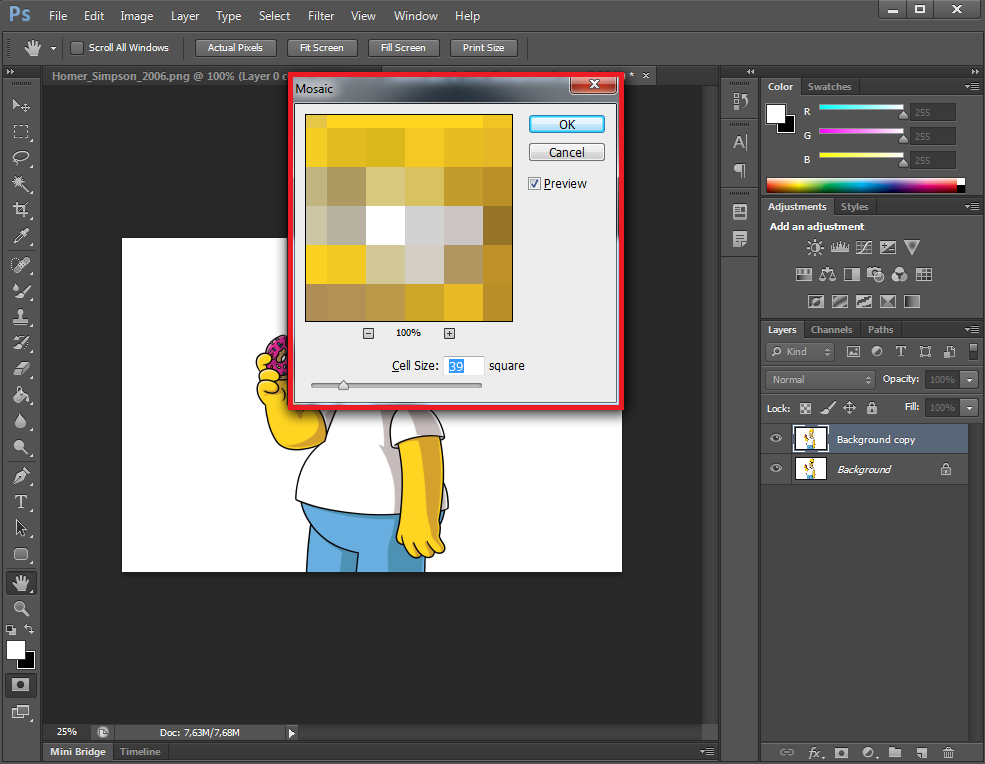
In the ‘Mosaic Option’ box you can adjust the amount of pixelation. Click ‘OK’.

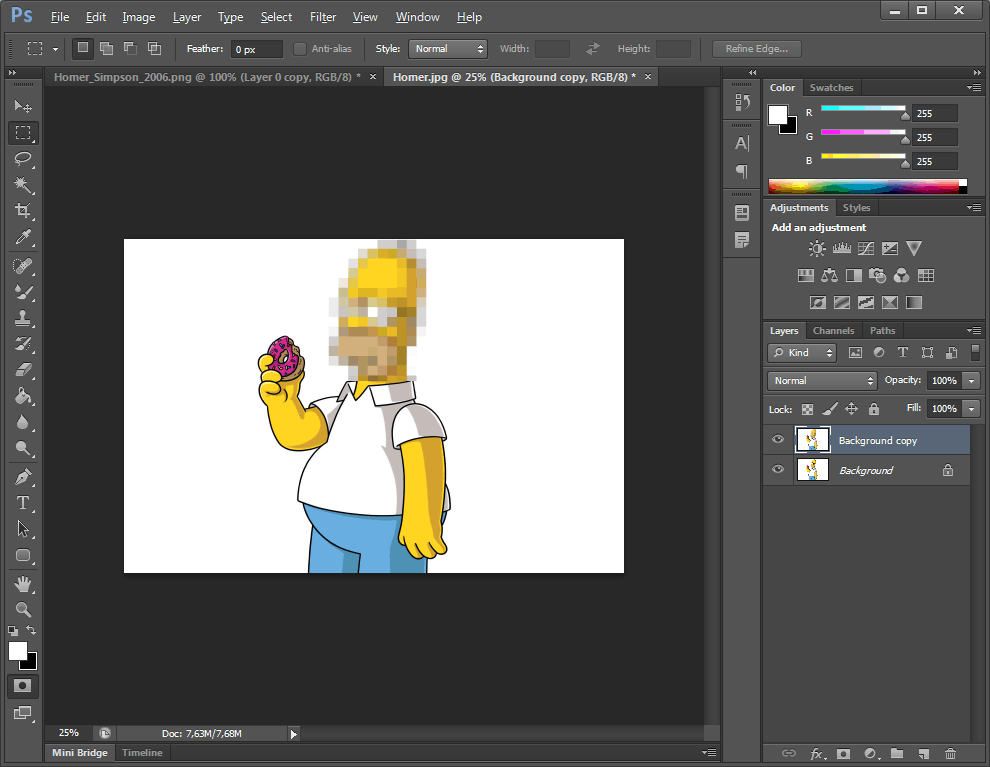
As you can see, Homers’ face is now pixelated. You now know how to censor/pixelate in Photoshop. Easy right?!


