How to Create a Custom Menu in WordPress
Create a custom menu in WordPress
You definitely want people to be able to quickly find your pages and posts on your WordPress website or blog. To realize this, you should create custom menus, highlighting specific important areas of interest on your site or blog and helping visitors to easily navigate your site of blog. Custom menus may contain links to pages, posts, categories, custom links and tags. Don’t know how to add a page in WordPress? Click here. To find out how you can add pages and posts to your custom created menu, click here. To know how to add categories and tags to a menu, click here and here. To create a menu with submenus, click here. There is no limit to how many menus you can create in WordPress, so don’t refrain from creating all the custom menus that you want or need that serve as a helpful and important navigation for your site or blog. But how can you create a menu in WordPress? Check it out here.
How to create a custom menu in WordPress
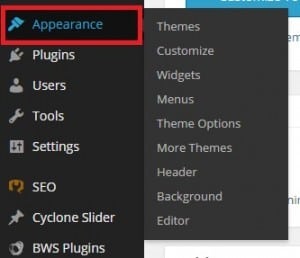
Open your WordPress dashboard. You see the word ‘Appearance’ in the vertical list of words running down the left side of the homepage.

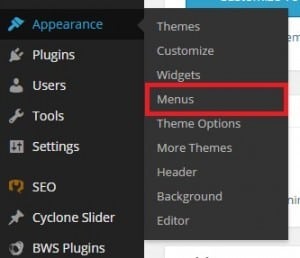
Click or hover over ‘Appearance’ and you will see several categories to choose from.

Click ‘Menus’.

At the top of the page, you see ‘Edit Menus’. Click ‘Create a new menu’.

Give your newly created menu a name.

Be sure to assign your menu to the correct location where you want it displayed on your site or blog. (Menu Settings – Theme Locations)

Click ‘Create Menu’. You now know how to create a custom menu in WordPress.

