How to Add Images to a Post in WordPress
Importance of visual stimuli.
For Search Engine Optimization, it is important to create posts (and pages) with enough words. Posts that only consist of text, however, are not very user friendly. Nobody likes to read a long text without some visual stimuli. Therefore it is good to add an image or several images to your posts. In the following tutorial, we tell you how exactly you can add images to a post in WordPress and how you can edit them. Go through a similar process when adding images to a page or click here for more specific information on how to do this. To set default image size in WordPress, click here. To add a post or several posts to a custom menu in WordPress, click here.
How to add images to a post in WordPress and edit them
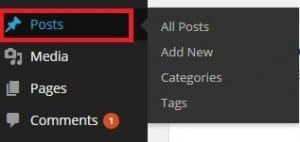
Adding an image to a post in WordPress is easy. Start by opening your WordPress dashboard. You see the word ‘Posts’ in the vertical list of words running down the left side of the homepage.

Click or hover over ‘Posts’ and you will see several categories to choose from.
Click ‘All Posts’.
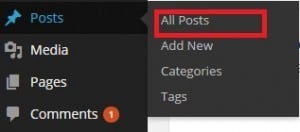
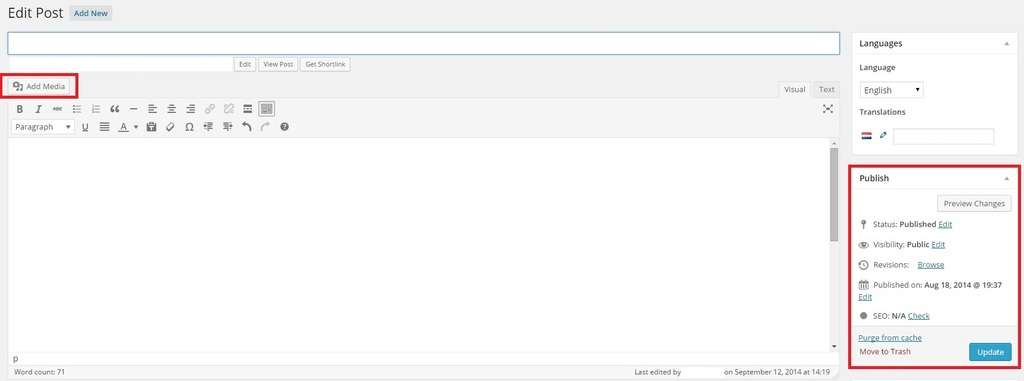
Click the post to which you want to add the image(s) or hover over the post title and click ‘Edit’.

Click ‘Add Media’ to add images to a post.
Choose ‘Upload Files’ to add images from your computer or external drive or choose ‘Media Library’ to add images that you already uploaded into your WordPress Image Library but that you have not selected for your site/post yet. If you do not want to make changes to the chosen image(s), click ‘Insert into Post’ (you can edit images later on).
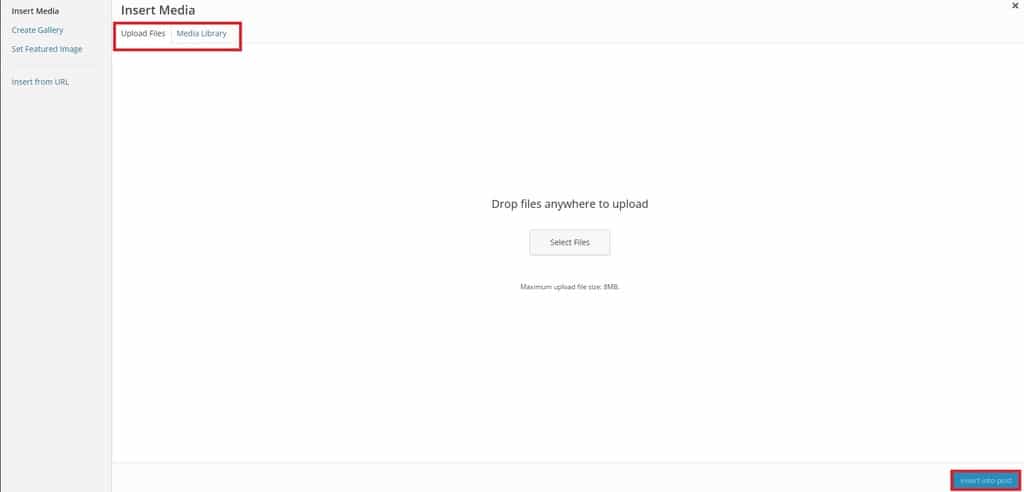
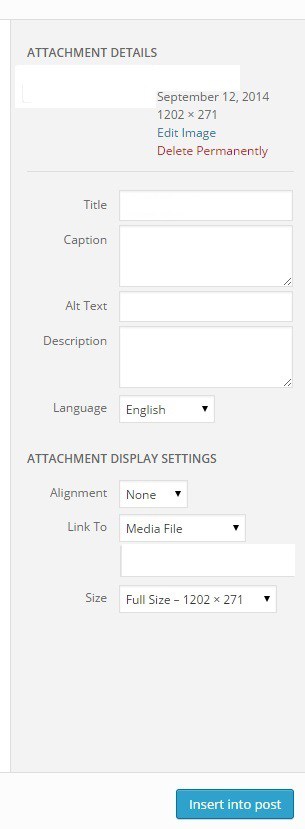
If you have selected an image to add to your post, you can also immediately edit it. You can decide on a title, caption, description, text and language (Attachment Details) and you can choose a certain alignment, decide on linking possibilities and define the size of the image (Attachment Display Settings). After defining the Attachment Details and the Attachment Display Settings, click ‘Insert into Post’.
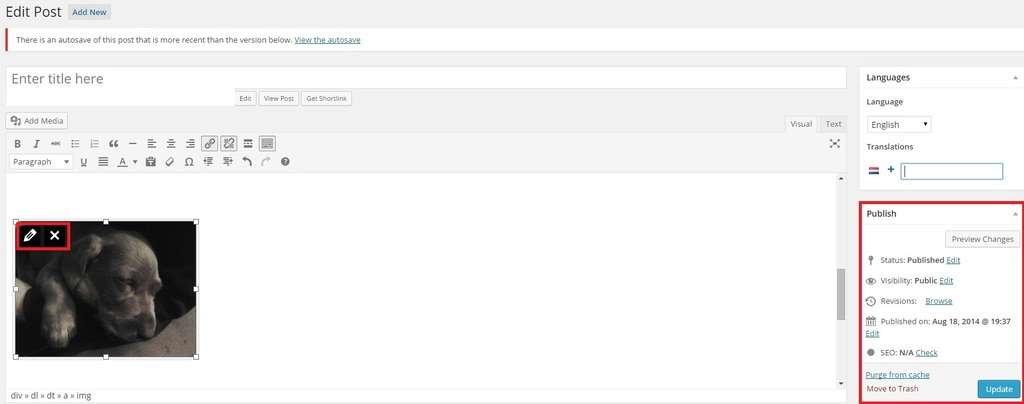
To edit images after adding them to the post , click the image and then click the Pencil. To delete inserted images, click the image and then click the cross. To publish your post with the image(s), click ‘Publish’ or click ‘Update’ if the post already existed without the image. If you want to preview your post with your image(s) before publishing or updating it, click ‘Preview Changes’.
 You now know how to add images to a post in WordPress. Go through a similar process when adding images to a page or click here for more specific information on how to do this.
