How to Add a Page or a Post to a Menu in WordPress
Adding pages and posts to a menu in WordPress.
To help visitors find important pages or posts on your WordPress site or blog faster, you can add those pages and posts to menus. Adding pages and posts to a menu is very easy. Watch out: only pages and posts that are published can be inserted into menus. Don’t know how to add a page in WordPress? Click here. Don’t know how to create a custom menu in WordPress? Click here. Also, if you have added a lot of pages or posts to a menu, it might be a good and smart option to work with submenus to avoid a cluttered menu. Check it out here to know how to do this.
How to add a page or a post to a menu in WordPress
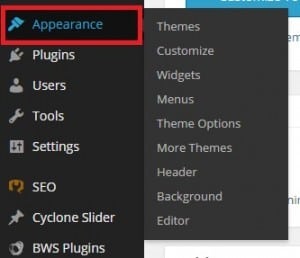
To add pages or posts to a menu in WordPress, first open your WordPress dashboard. You see the word ‘Appearance’ in the vertical list of words running down the left side of the homepage.

Click or hover over ‘Appearance’ and you will see several categories to choose from.

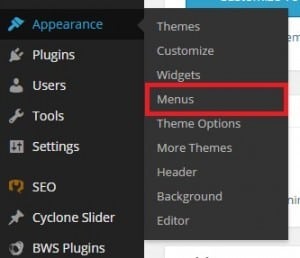
To add a page or a post to a menu, click ‘Menus’.

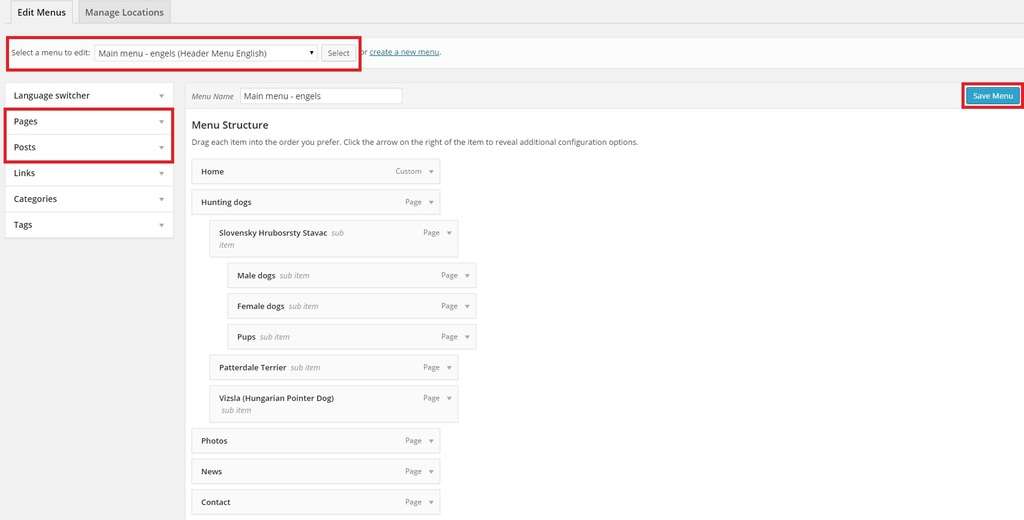
First be sure to select the correct menu that you want to edit. Click ‘Pages’ or ‘Posts’ to select the pages or posts that you want to add to this menu and click ‘Add to Menu’ to add them. Tip: If you want to add several pages or posts to your menu, click ‘View All’ after clicking ‘Pages’ or ‘Posts’ to get a clear overview and select all the pages and/or posts that you want to add before clicking ‘Add to Menu’.

Sometimes only the Pages, Links and Categories panels are shown. If you’d like to add posts as menu items, simply use the Screen Options tab at the top-right of the screen to enable this panel as well.
Your selected pages and/or posts are now added to your menu of choice. Drag them into the order you prefer. Click ‘Save Menu’ to end. (If you have already done this and make changes later on, click ‘Update’ to save.)
Don’t know how to create a custom menu in WordPress? Click here. Want to know how to create a menu with submenus like in this example? Take a look here.

